By popular request, I am going to create a series around avoiding risk to your home. This first article will focus on preventing flood damage. We just had a tremendous amount of rain here in Ohio, so it seems very relevant. Shoot me some feedback if you’d like more detail on any components. Reflecting on pictures from projects I did months ago at this stage.
This walk-through covers a couple topics:
- #1 – Replacing an old sump pump
- #2 – Installing a backup system
- #3 – Running a new drain pipe from a sump pump well to the street
Intro
My home was built in 2004, so my existing sump pump is about 12 years old which is in my opinion playing with fire. I personally wouldn’t exceed 10 years with any single sump pump. My property tends to get a lot of water and my sump pump runs pretty frequently. So as I was approaching the idea of finishing my basement it was definitely time to replace my unit. The good news is it’s easy and surprisingly a cheap DIY for the initial swap. The only wrinkle with my process is that I have a radon cover on my existing well which added a little time to achieve the proper seal on the well. I also over-engineered my home (read more in the last section further below), but better safe than sorry!
Tip #1 – Replace equipment 10+ years old.
The Swap : What you need/what I recommend
- New Sump Pump: 3/4 HP Cast Iron and Stainless Steel Sump Pump
- Check Valve : Zoeller PVC Plastic Check Valve, 1-1/2 Inch


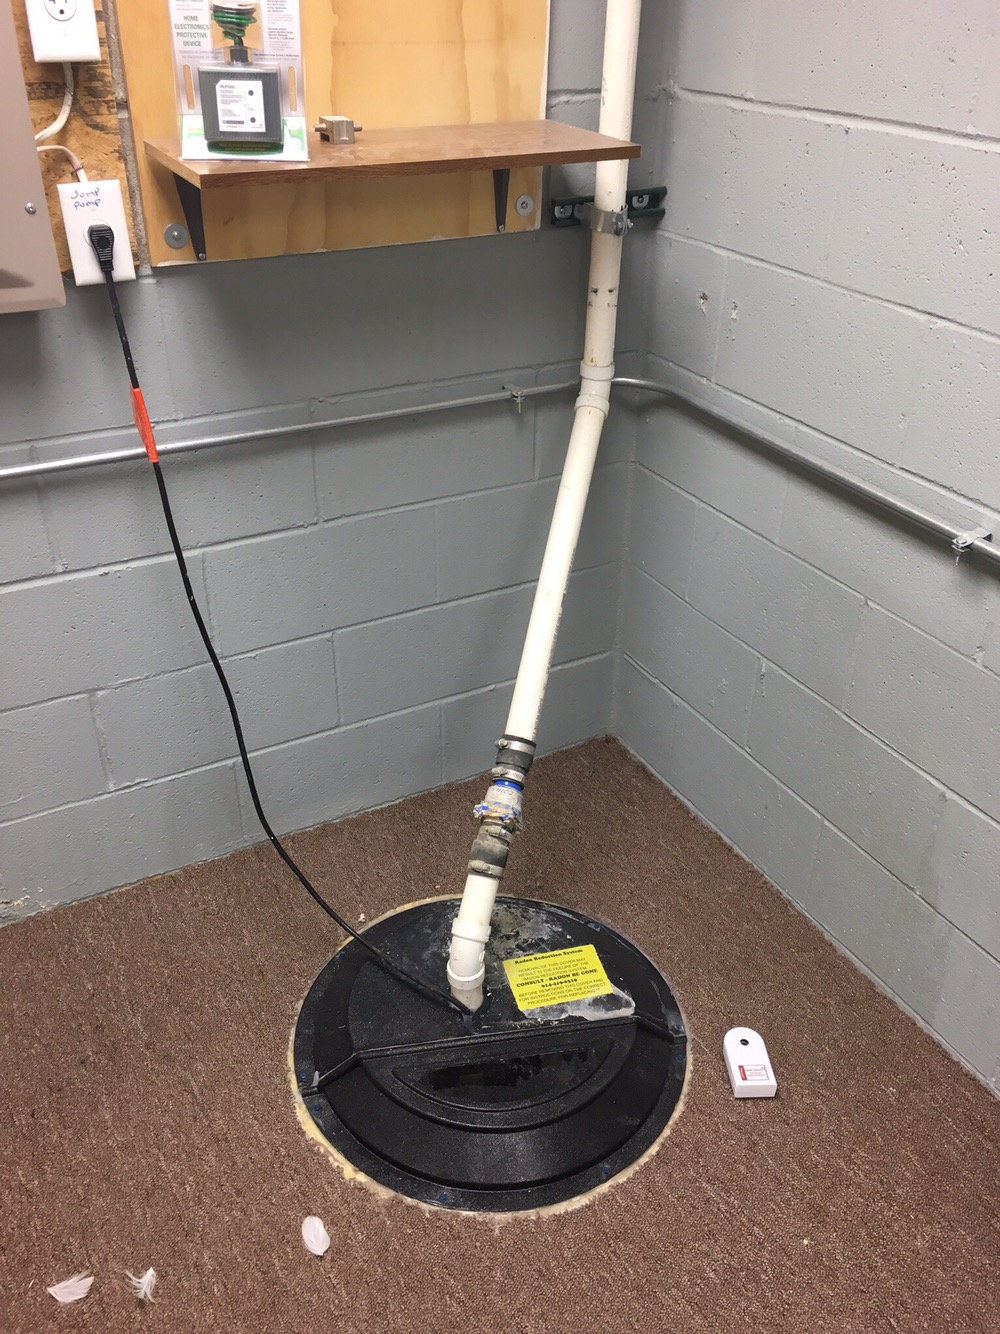
This is my initial setup. Please note the water sensor which I encourage at any location that has the potential for a water leak, such as under the kitchen sink, sump pump, utility sink, hot water tank, etc. They are cheap and effective, so why risk it ?
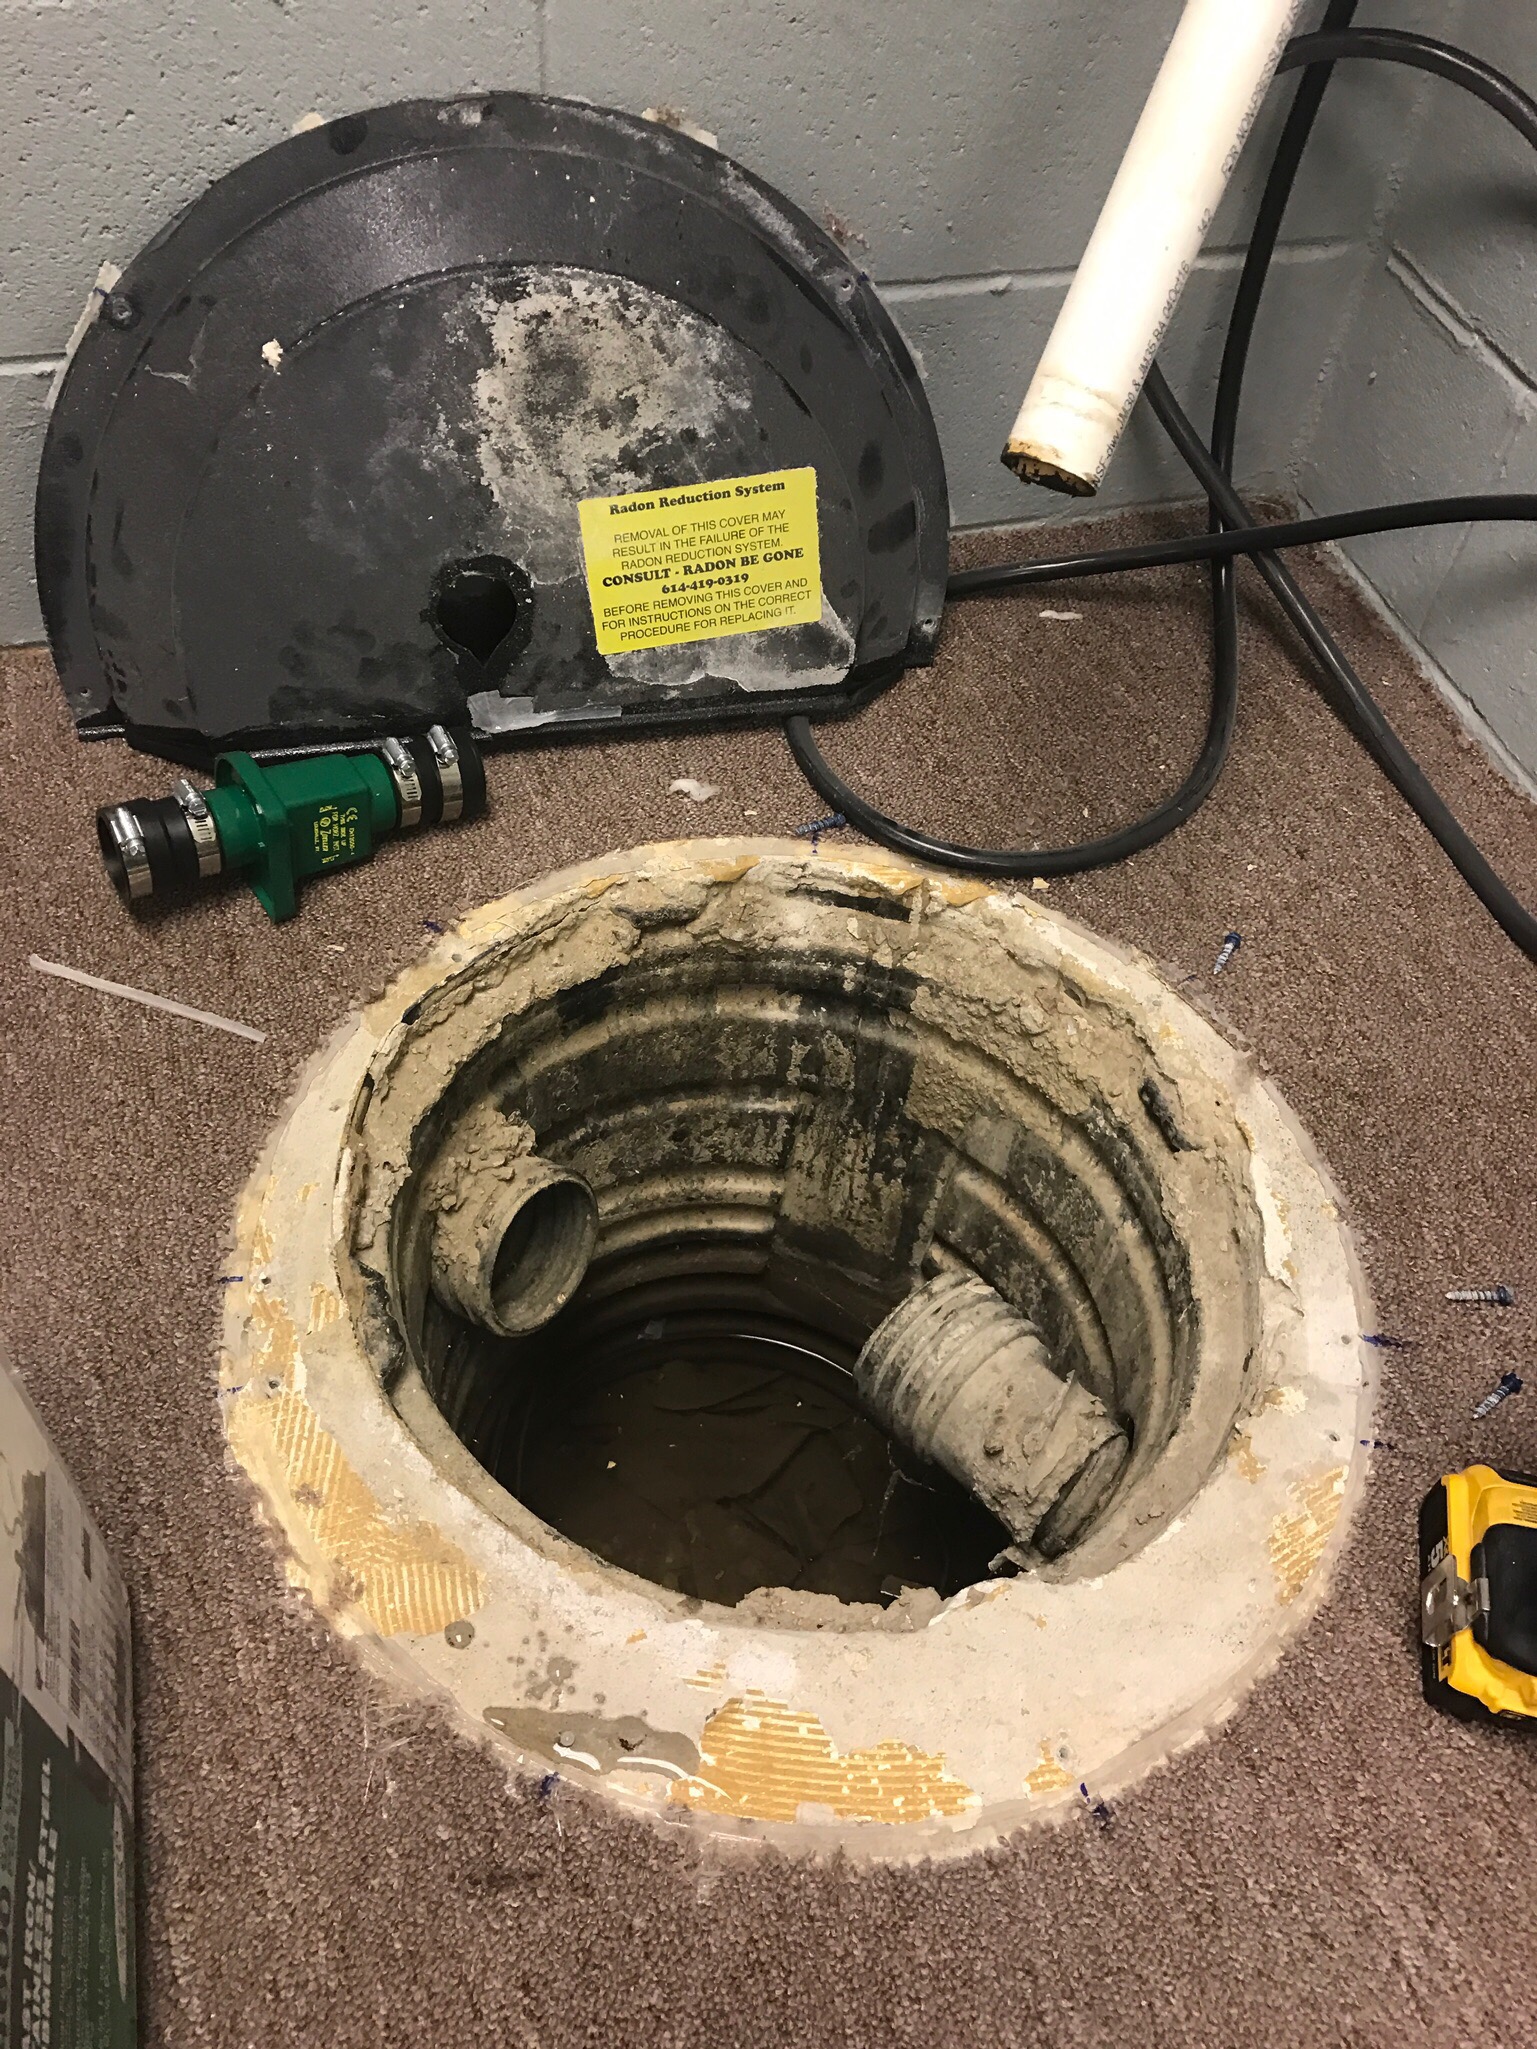
I unscrewed the radon cover and removed it so that I could access the well and the sump pump unit. I made sure I was working on a week that had no rain forecasted. Yes a week, just in case you have unforeseen issues.
First thing you’ll need to do is unplug the equipment. Next you’ll unscrew the clamps that secure the check valve. The check valve for reference helps prevent water in the tube when the pump shuts off from flooding back into the sump pump well. As you unscrew this valve, expect a gallon of water to come at you! Be sure to have a bucket or direct it to the well.
Once that is unhooked you should be able to pull the sump pump assembly out with the pipe attached.
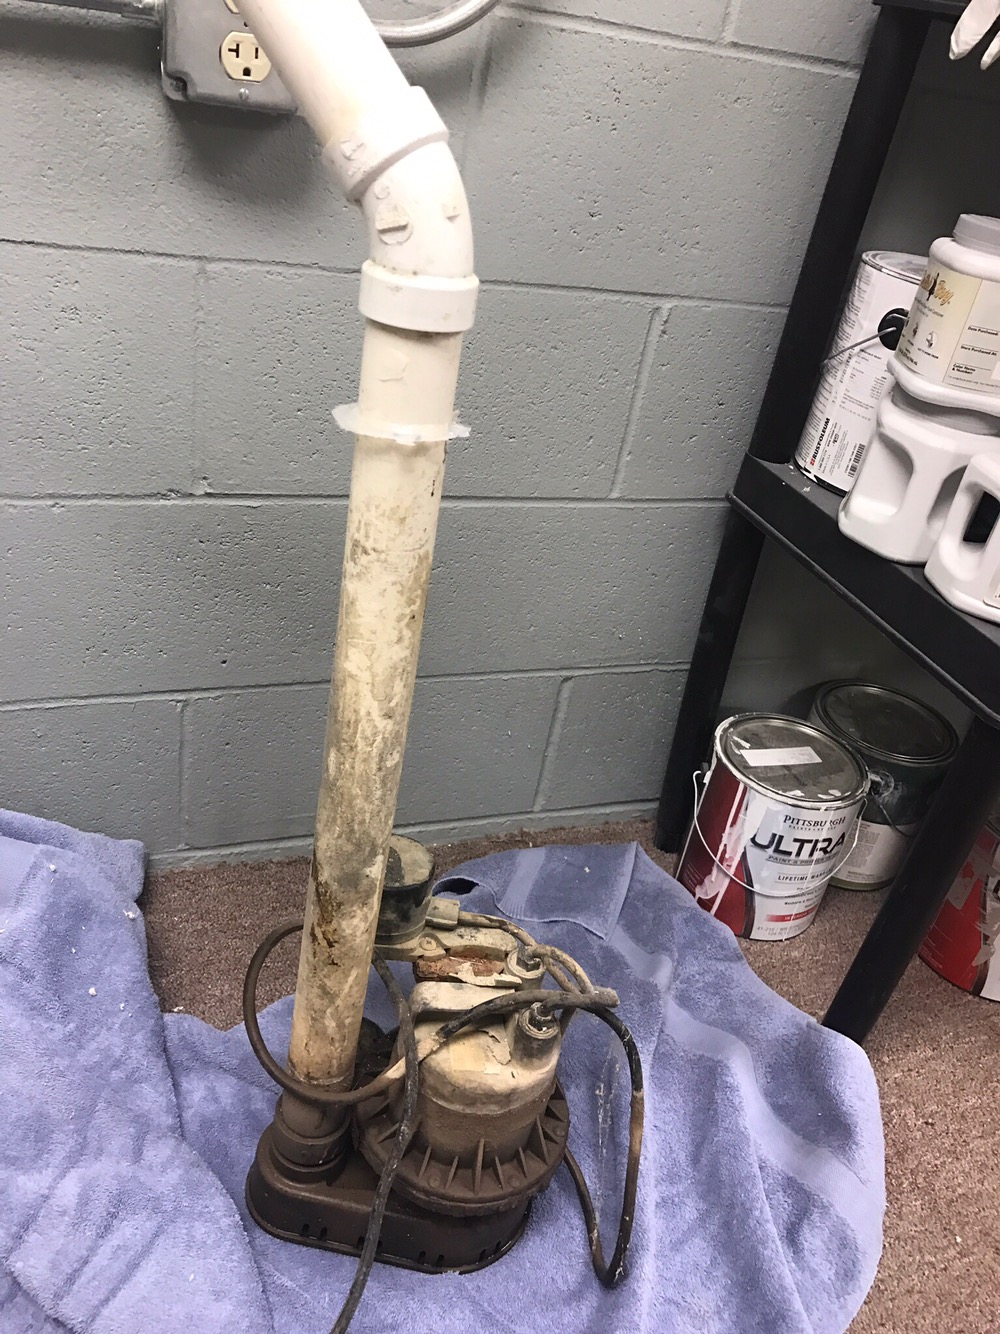
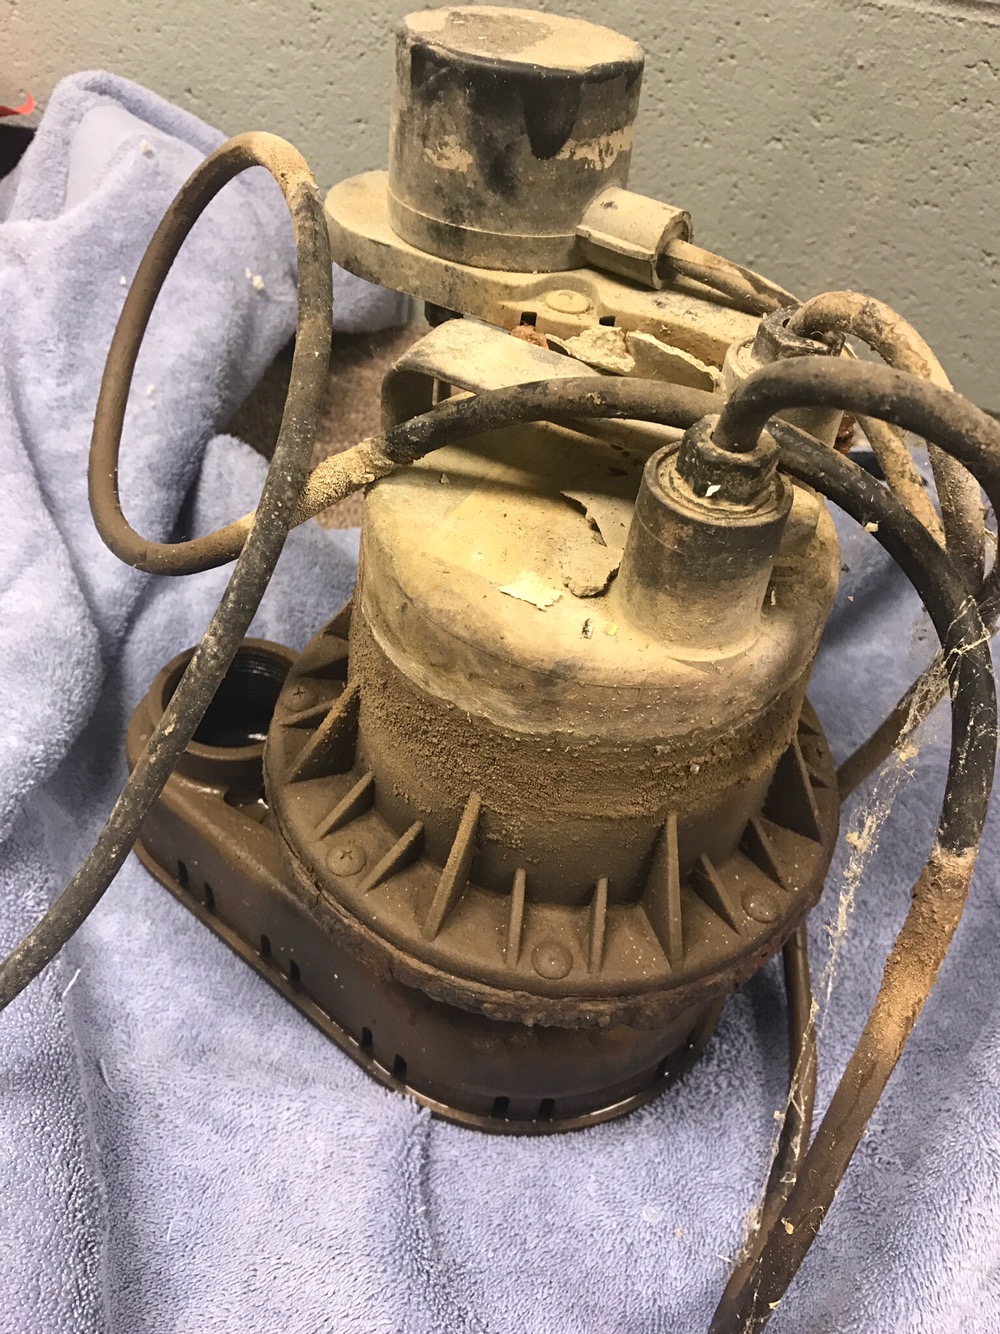
As you can, see my sump pump was in bad shape. The majority of the metal components associated to the switch were almost rusted through.
At this stage the tube should unscrew and you can swap the new unit. It is a male threaded screw in to the sump pump assembly. The new unit should have the same attachment. Inspect and clean the plastic threads if they have any rust or corrosion from the previous unit.

I purchased this beast because I just finished my basement and want to avoid any potential damage. And, I tend to over-engineer things. For those of you who have a Menard’s nearby, they have several models that are very reasonably priced. If your model is over 5 years old I would consider purchasing one as a “backup” for worst case scenario (because the system typically fails at 2am when all the stores are closed)!

Once the pipe is attached you’re in the home stretch. At this point you can submerge the new unit in the well and begin reconnecting the new check valve. I was fortunate and everything lined back up. Make sure you do not have a sharp angle at your check valve, you don’t want to have leaks!
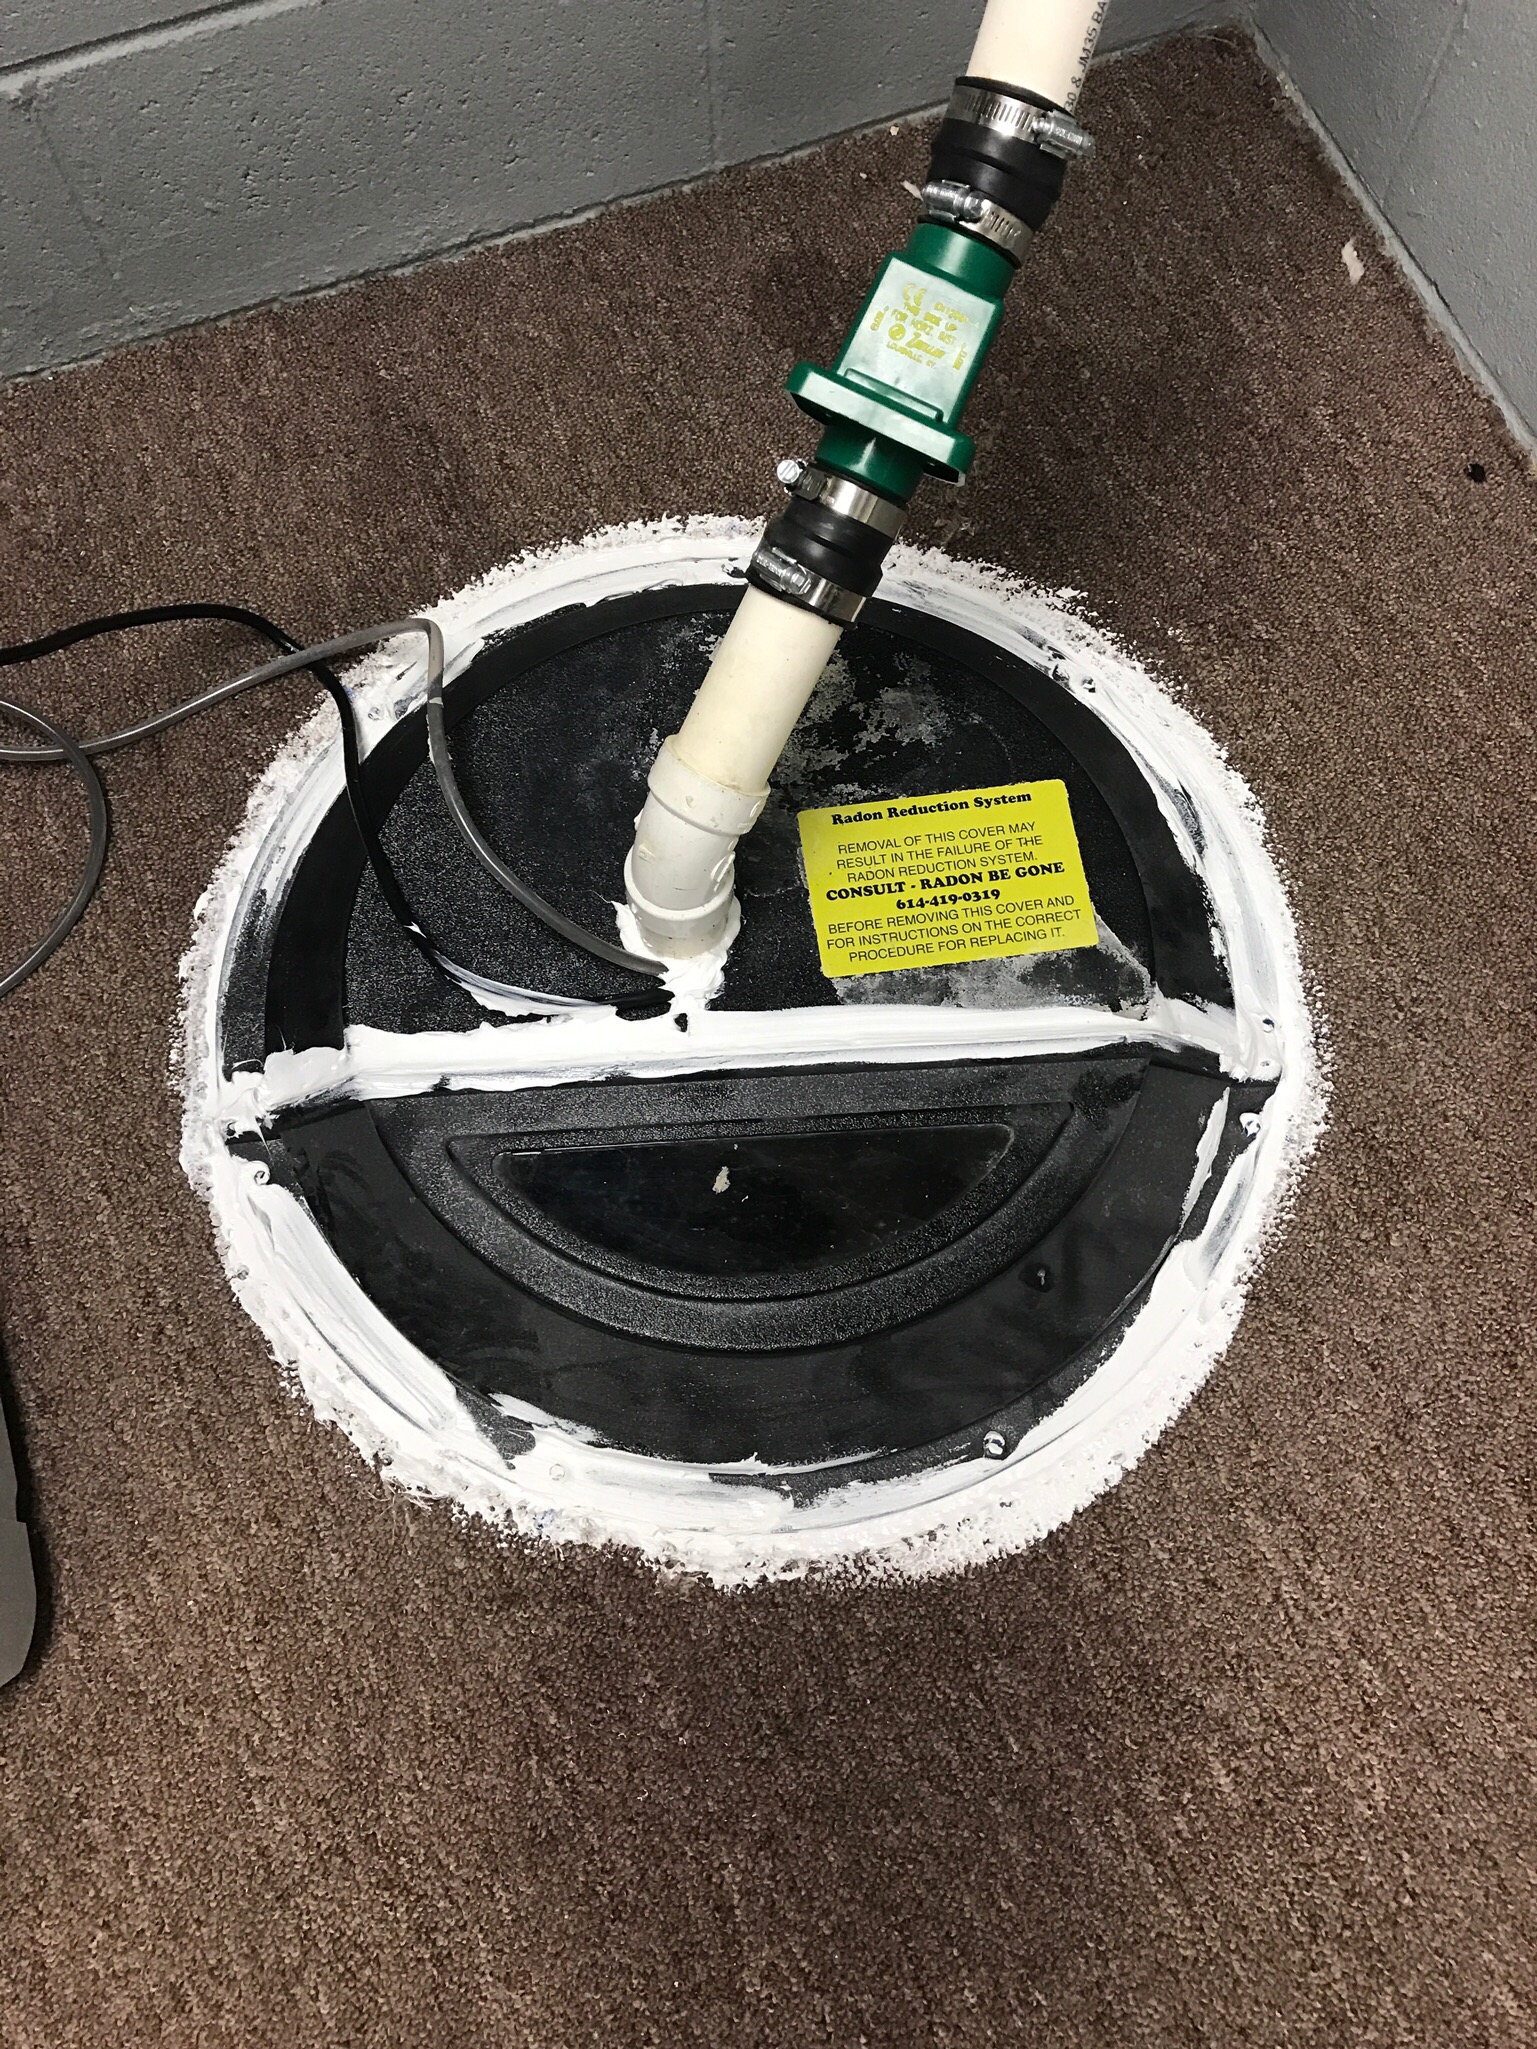
In this last picture I have everything back together and I used some extra caulk I had to seal the radon cover back (go buy clear or black if you need to do this, I don’t recommend white – ha ha). Before you get to this stage make sure you test it multiple times using a 5 gallon bucket to fill the reservoir. You’re looking to make sure all the seals are secure (no leaks exist), and that the unit is being triggered by the rising water level. The float switch on each unit is a little different, so make sure it’s not obstructed. If no issues exist, you’re done! For my job it may have been an hour swap, the radon cover being the most time consuming part.
#2 – Backup sump pump / Secondary pump
I researched a variety of models and setups. For example, adding a battery backup to an existing sump pump, which isn’t too expensive – maybe $200 – and then every 5 years you need to replace the battery at $100-$150. The thought of this didn’t set well with me because it would rarely be used. If the single sump pump unit fails you’re still in trouble.
Second option is a separate sump pump with a battery backup ($200-$300) which is getting better in my book, but I really hated the idea of replacing batteries even if you never used it.
The 3rd option is only recently getting traction and I liked it because it works in the worst conditions (no power, no battery ) and it’s very reasonably priced.
- Entry Level (Low Cost) Example : Basement Watchdog + battery 😦
- Recommended (Quality) Example : Zoeller Sump Pump w/ Battery Backup ($520)
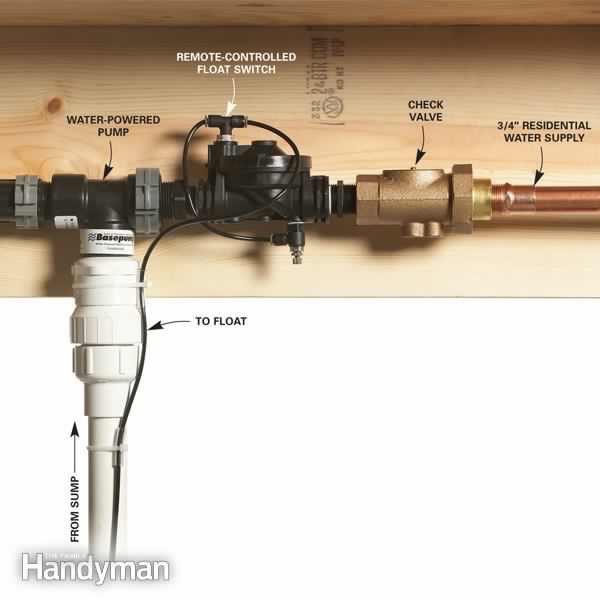
- My Proposed Choice: Basepump RB 750 Water Powered Backup Sump Pump
The last option, and what I went with with, was a water powered sump pump. My basement at the time was unfinished so I had access to the water pipes in the ceiling. I also wanted to leverage the second well at the other corner of the basement, which was able to access water lines easily.
Special note here, most folks do not have a second sump pump well. I had an issue the last 2 years which blocked the my sump pump drain at the street level due to backed up snow and ice on the curb from the plow folks. I had to open the emergency vent (which you can unscrew ). This ended up causing erosion damage at the side of my house (grass).
Before approaching a water sump pump solution, you need to test your water pressure. An unrestricted 1/2 pipe should be enough here in Ohio but I would recommend a 3/4 water line (need 50 PSI +). The concept is to see how fast you can fill a 5 gallon bucket. If you can do it under 40 seconds, for example, you have enough pressure (mine was around 32 seconds, from a 1/2 inch water line!). Review the manufacturer’s guidelines before purchasing! I’ll also cover a little about how I ran a new drain line to the curb to help mitigate my blocked pipe situation. Both very unique to my home, but it will be good if you are familiar with the install. These units can pump out 600-750 gallons per hour for reference. Not as fast as electric but seem to be more than enough for typical homes.
First the basics of a water sump pump. The synopsis is that for every gallon of water you use, it creates a vacuum and extracts two gallons of water. Water is one of the last things to fail in disasters because it’s all underground (vs. electric lines and poles that can be damaged by elements). So when zombies come or a bomb goes off I may still be able to keep water out of my basement.
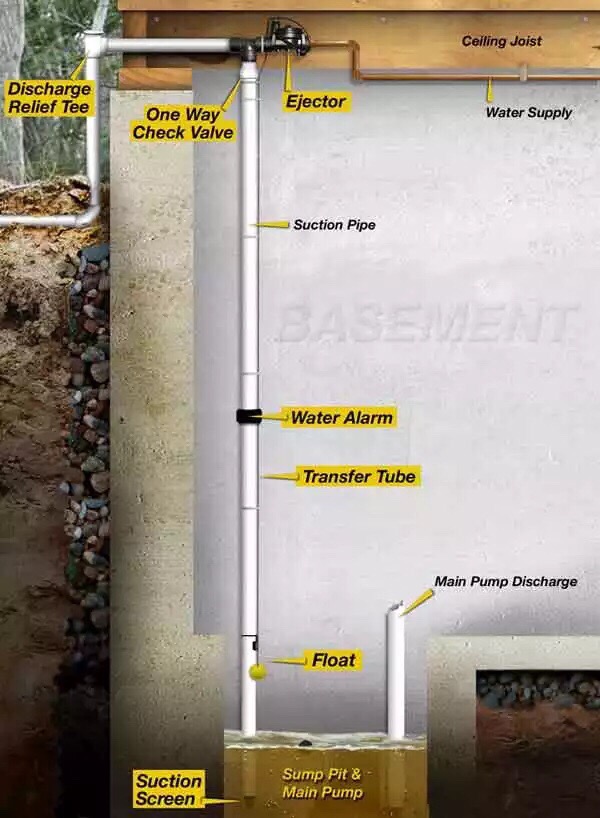

First you will need to locate a 3/4 inch water line, typically these exterior faucets for hoses. However I recommend taping a cold water line where it enters your house (CPVC pipe). It’s important not to tap a smaller 1/2 line that feeds most of your sinks and other items inside your house. You may not have enough pressure.
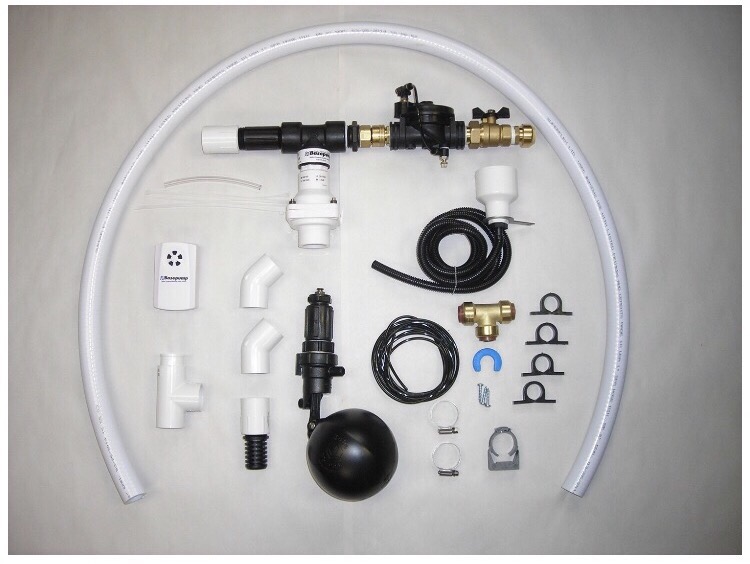
Just a reminder the company recommends you run a water pressure tests that judge how fast you can fill up a 5 gallon bucket (40 seconds or less). I was within the thresholds for the Basepump 750 model so that’s the one I purchased. I went ahead and got the EZ kit which included majority of the things you’ll need and save you a trip to the hardware store. However I don’t seem to see this as an available option right now. The picture below shows the additional accessories you may need.
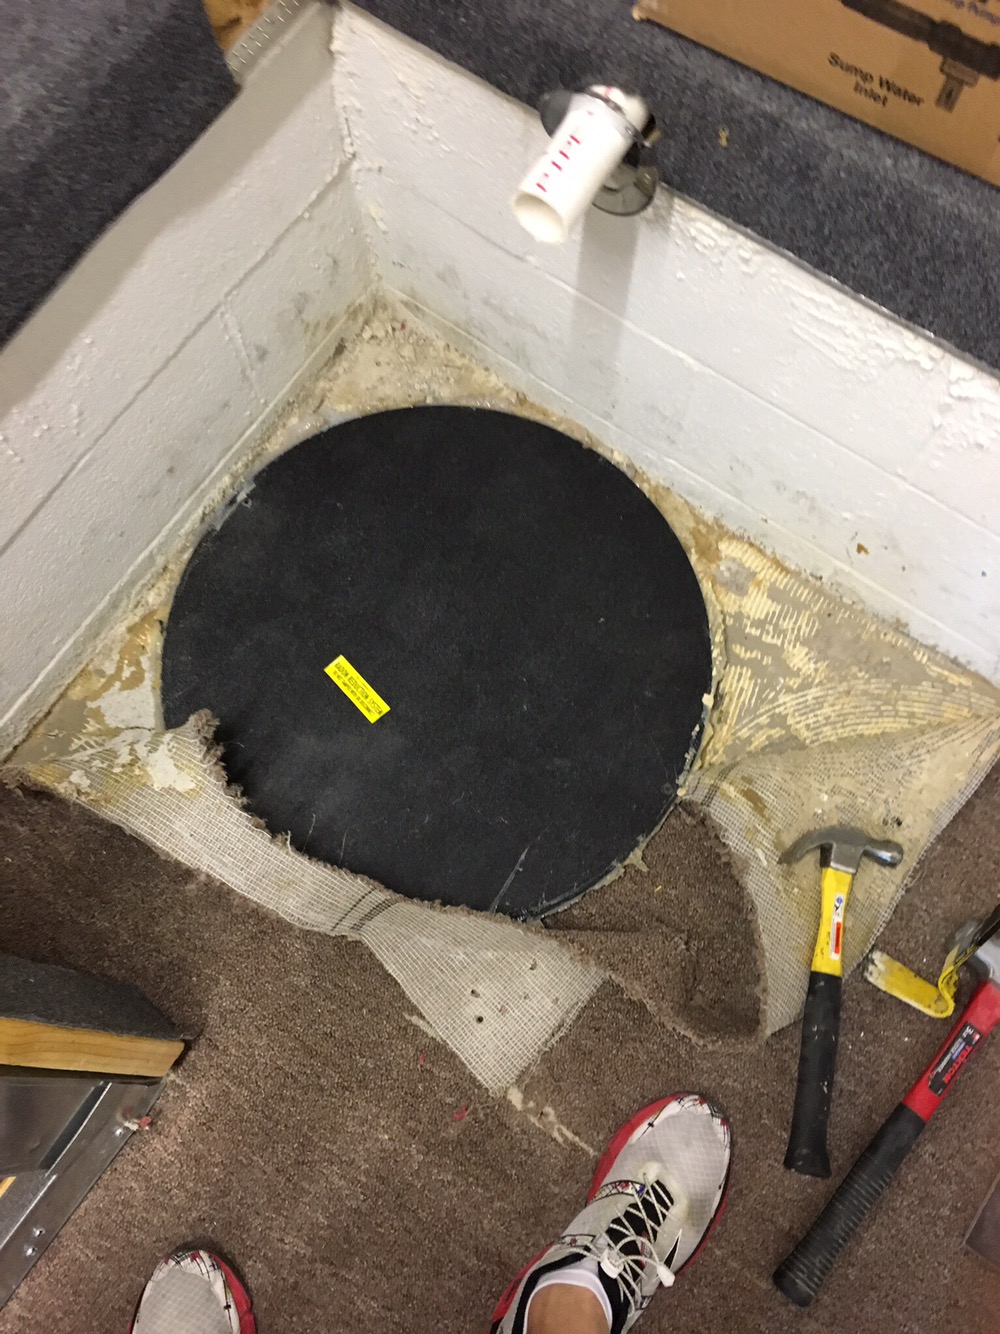
Starting to remove radon cover
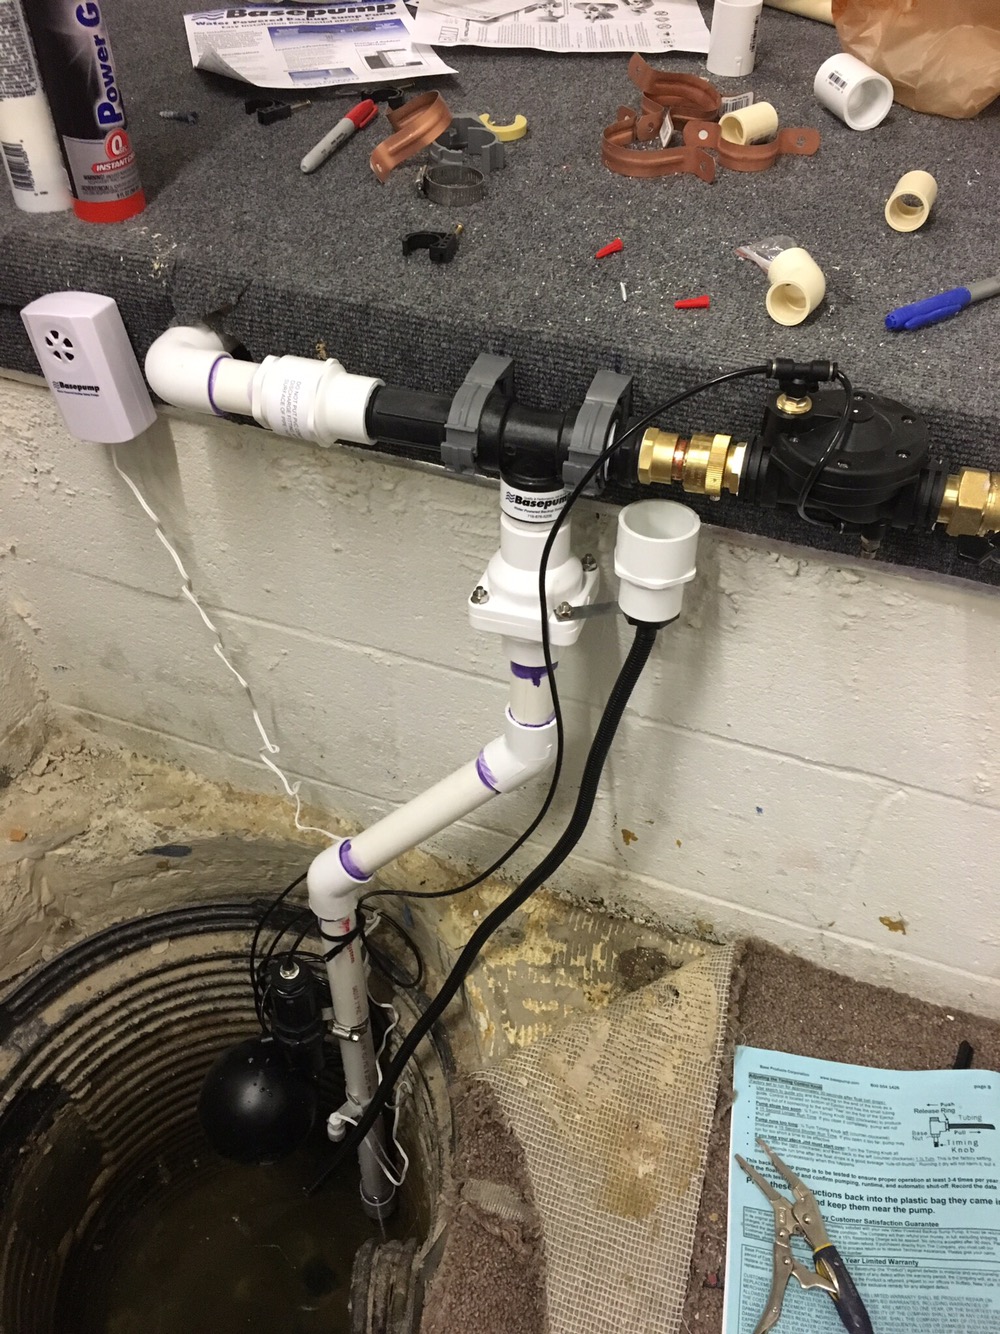
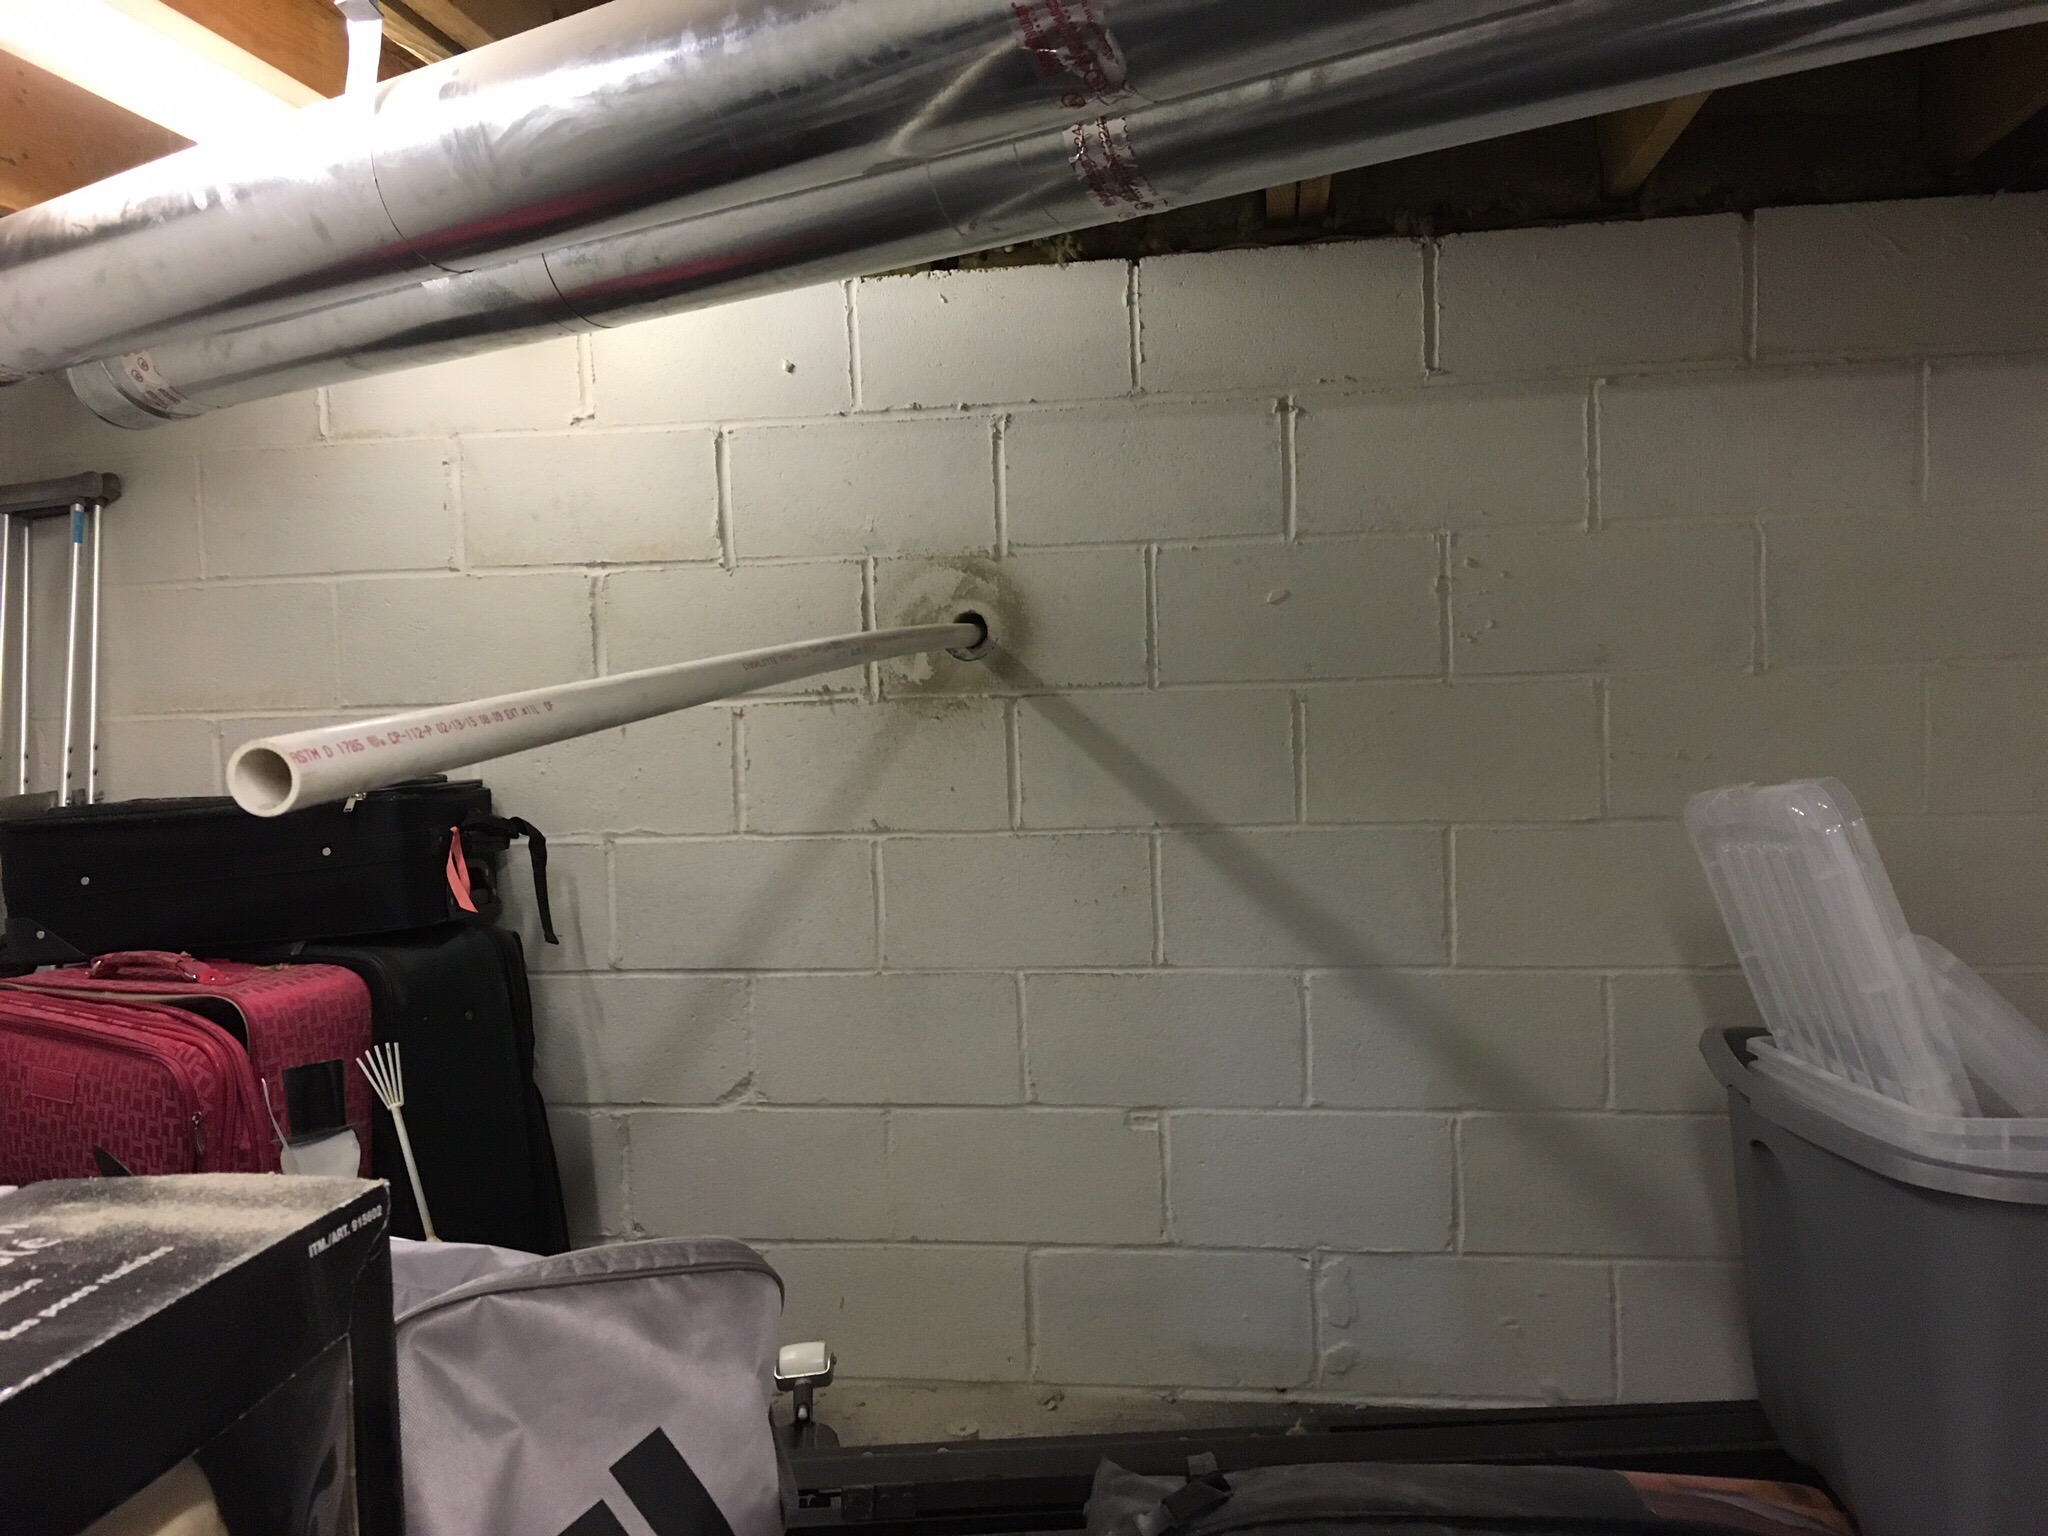
This was my initial setup. I wanted to keep the water lines out of the way (I did not mount it to a top joist as pictures from manufacturer suggest). By mounting it this way, it was secure and I could access all the storage in my storage room. This setup took around 2 hours but I was already familiar with plumbing and already purchased pipe and joints ahead of time to run water to the unit. The kit did come with a “T” shark bite style water tap for a 3/4″ water line. I just needed a dozen or so feet of 3/4 pipe to run from the water line to the unit. And then I needed another dozen feet of 1.5″ PVC pipe for the drain line.
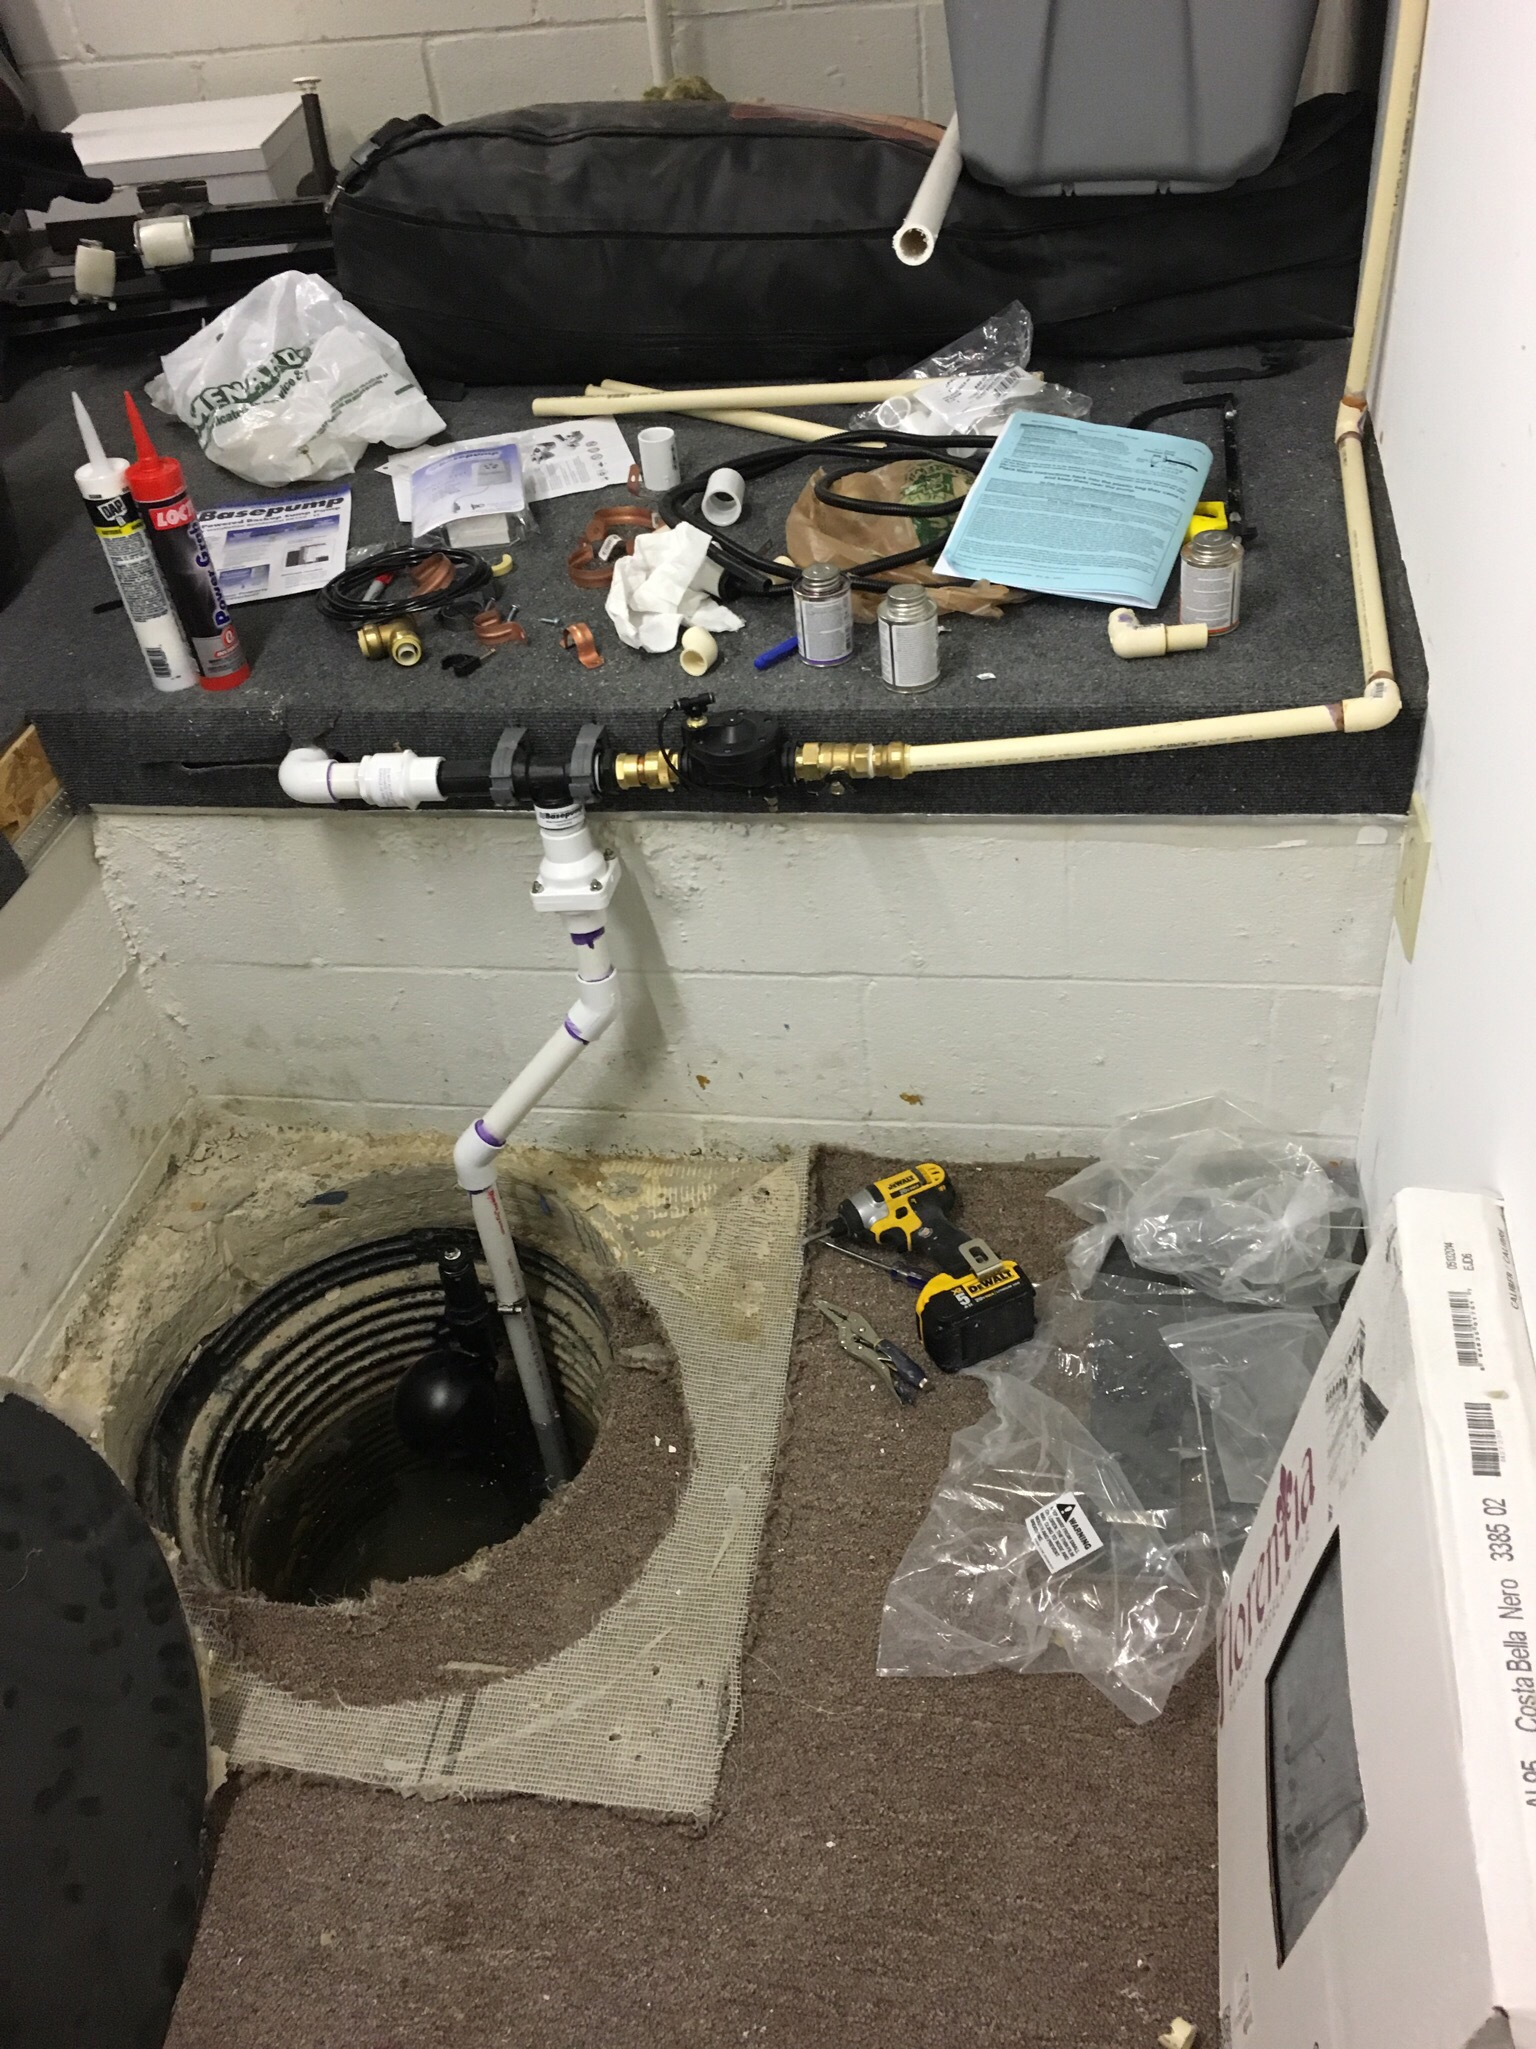
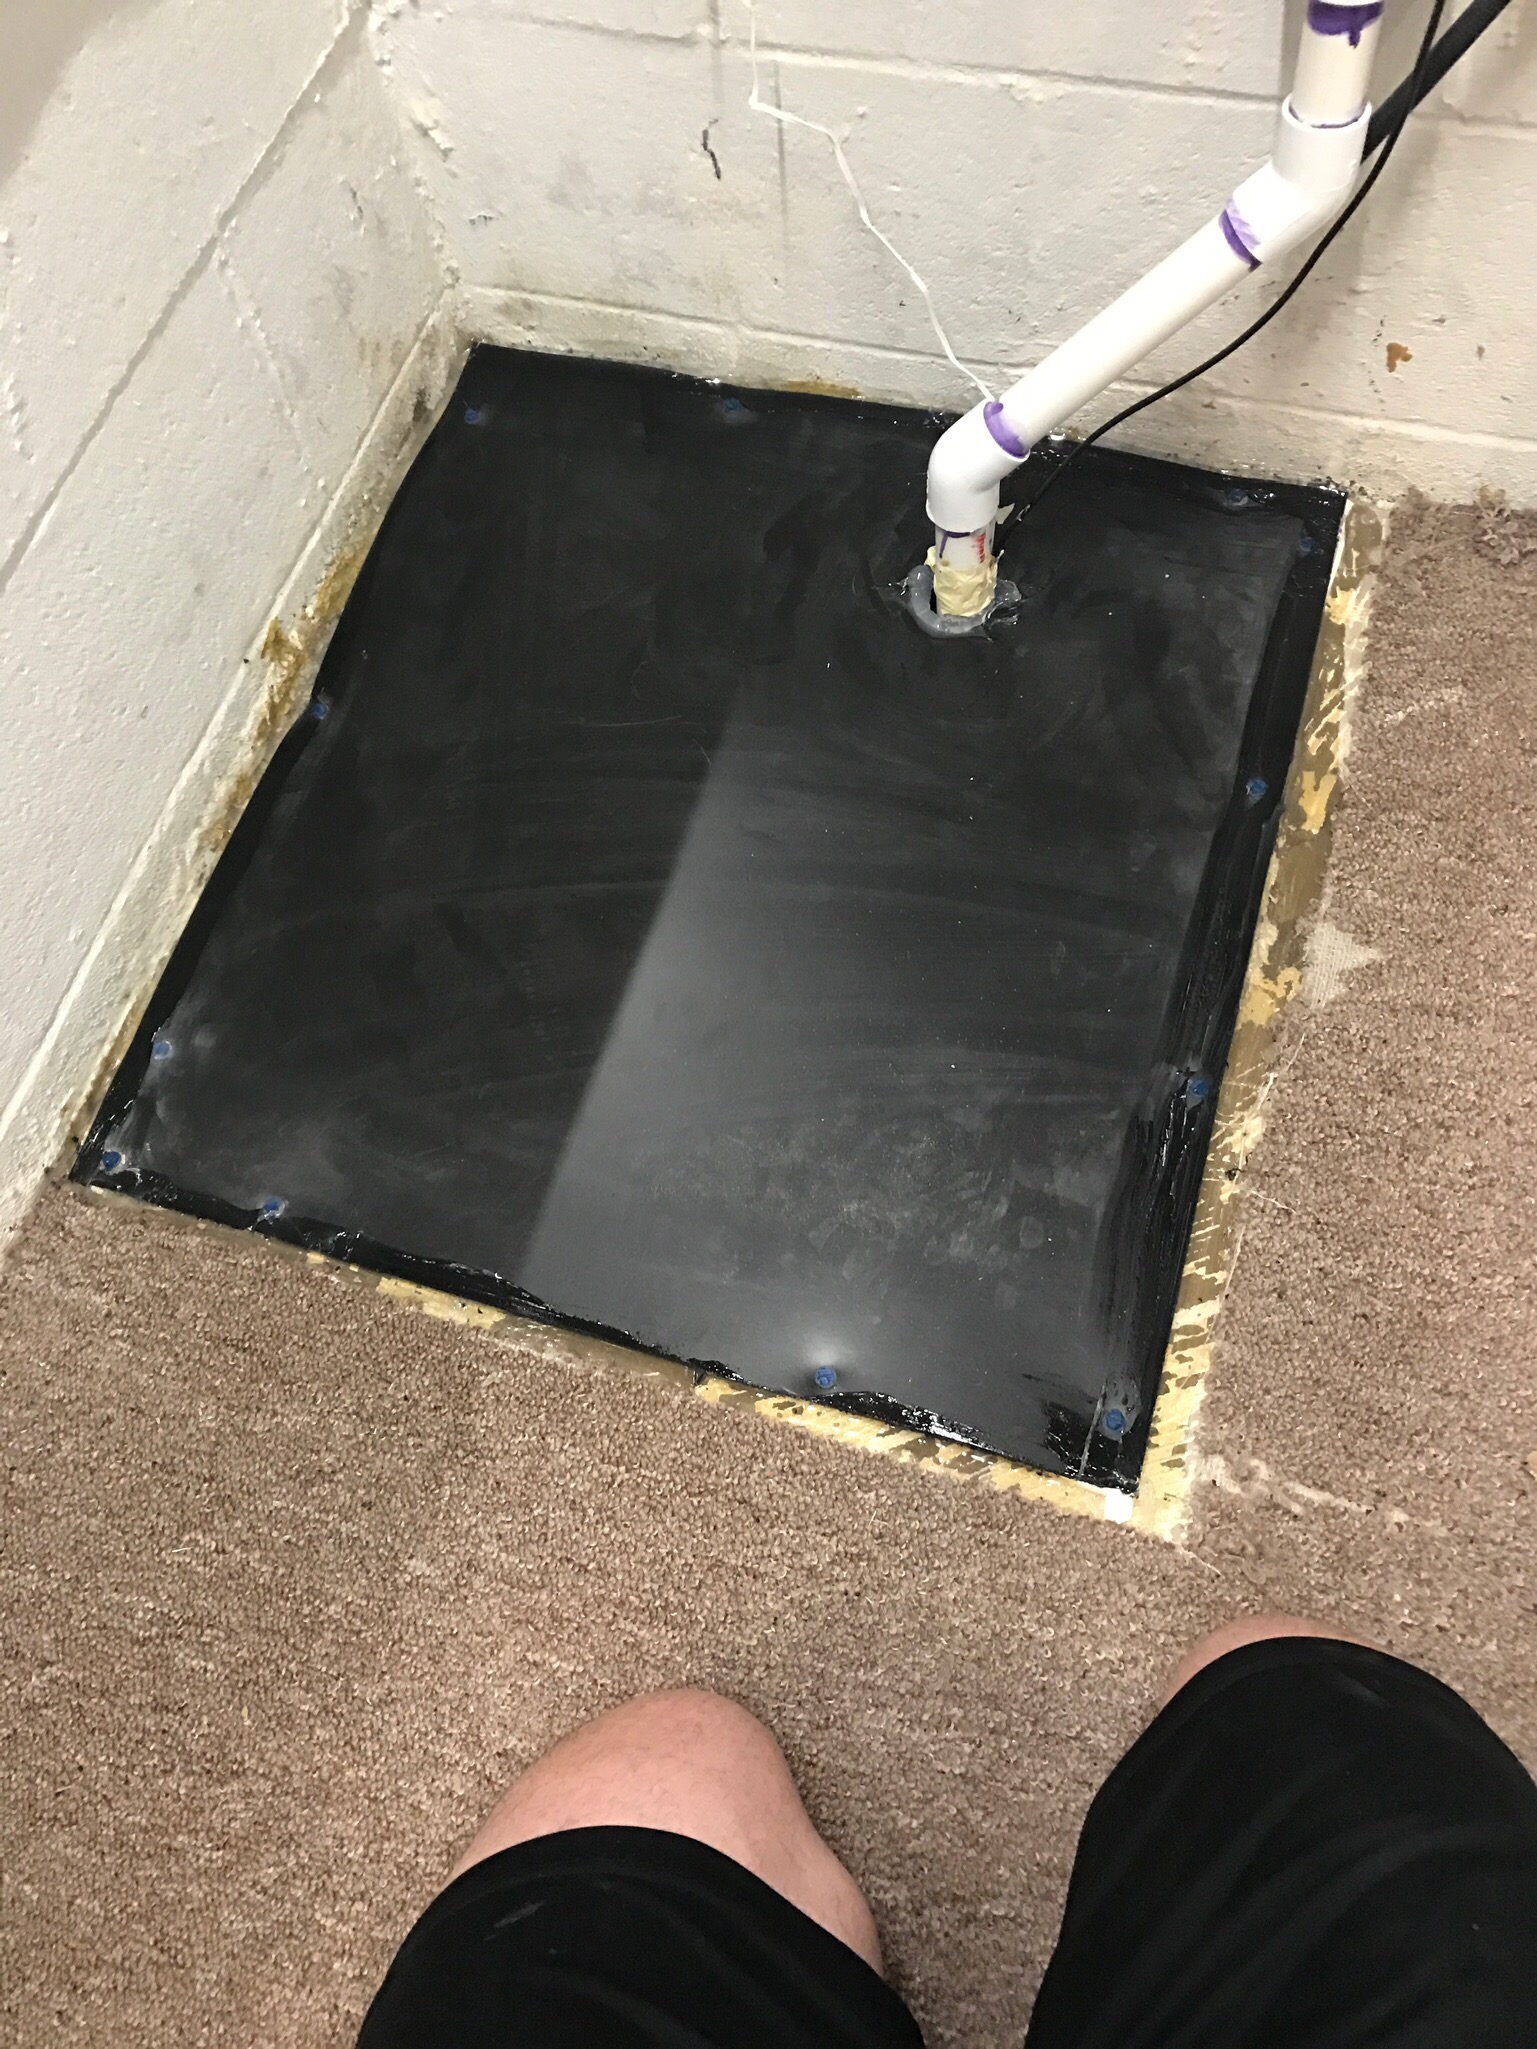
As you can see I took a variety of steps to seal the well and protect it from getting stepped on since this is a fairly high traffic area. I also installed the water level sensor that came with the unit. The idea is if this unit is triggered, an alarm will go off letting the homeowner know the primary sump pump has failed. I rigged the water sensor a couple inches higher than the other primary sump pump so this model will only run in emergency situations.
Below is a demonstration video of the unit in action. I was happy with this performance!
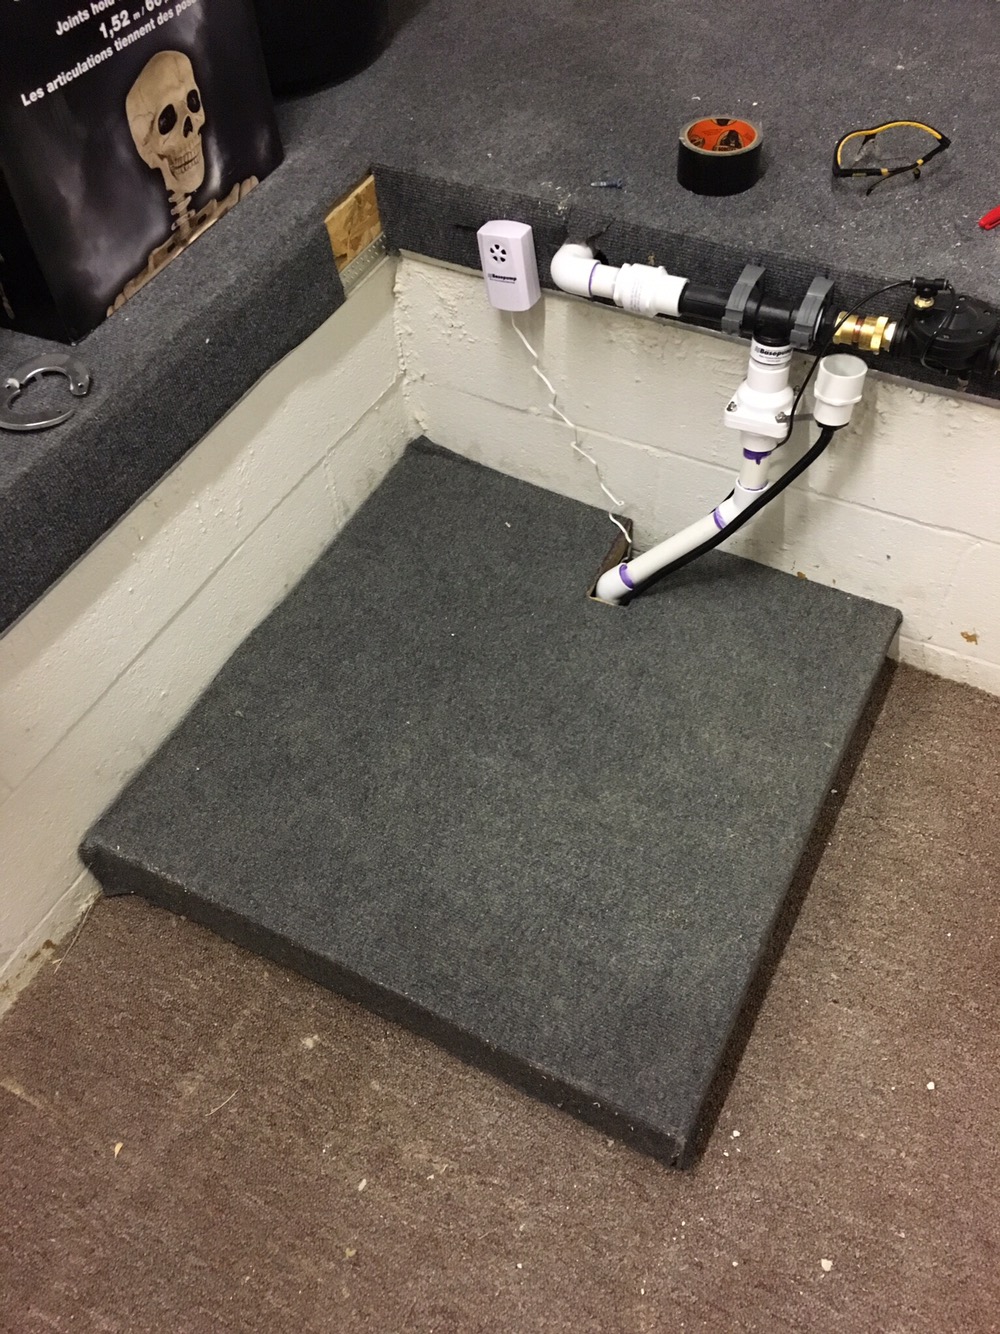
I was able to purchase some Solid Black Hi-Density Polyethylene from Menard’s and cut it to replace the old radon cover. Sealed it with a clear chalk.
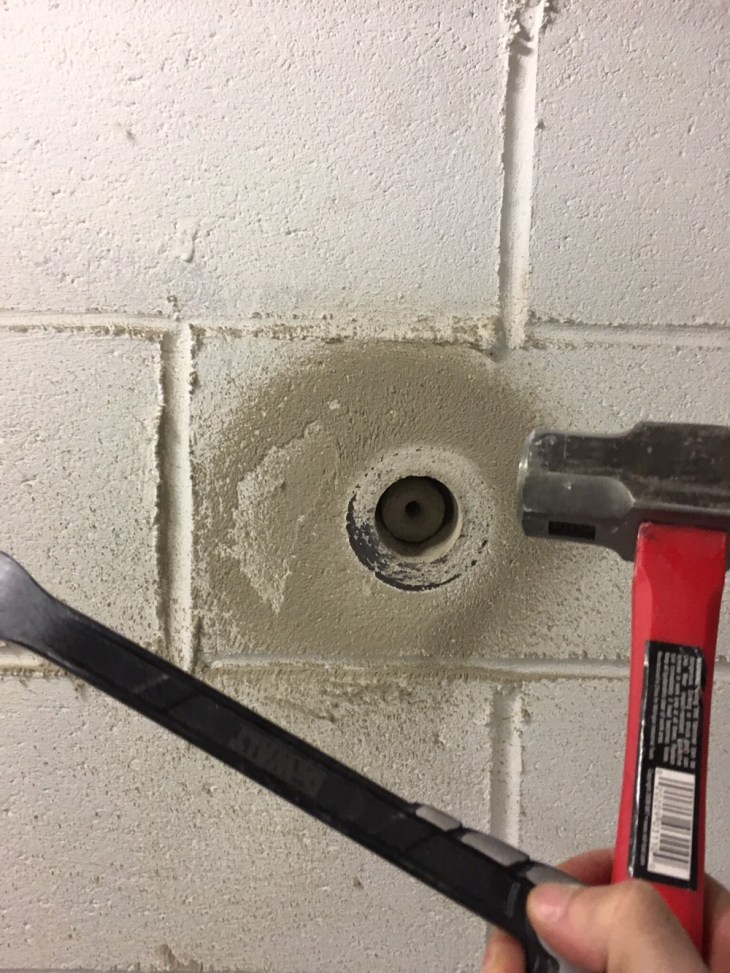
Below are a variety of pictures of how I drilled a hole through my cinder block basement wall into the front of my home/landscaping. I was aware my gutter system ran underground in the front of my house to a second drain pipe to the street. I wanted to edge my risk with it being blocked at the street so now I had a sump pump directing water to 2 separate drains.
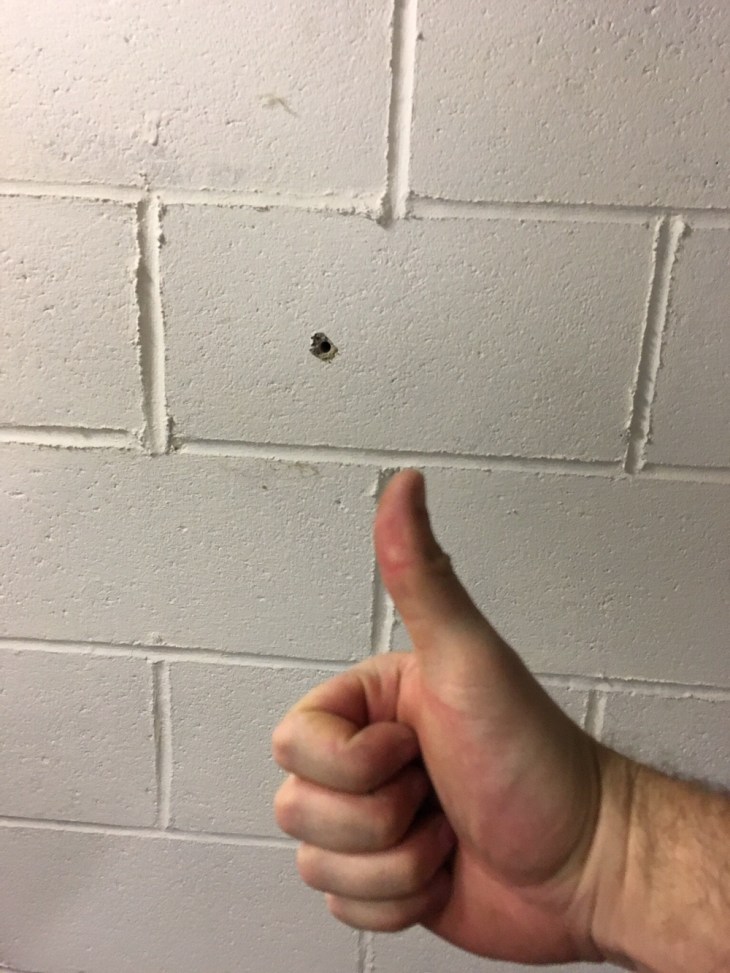
Guide hole after rough measuring to make sure everything was lined up right.
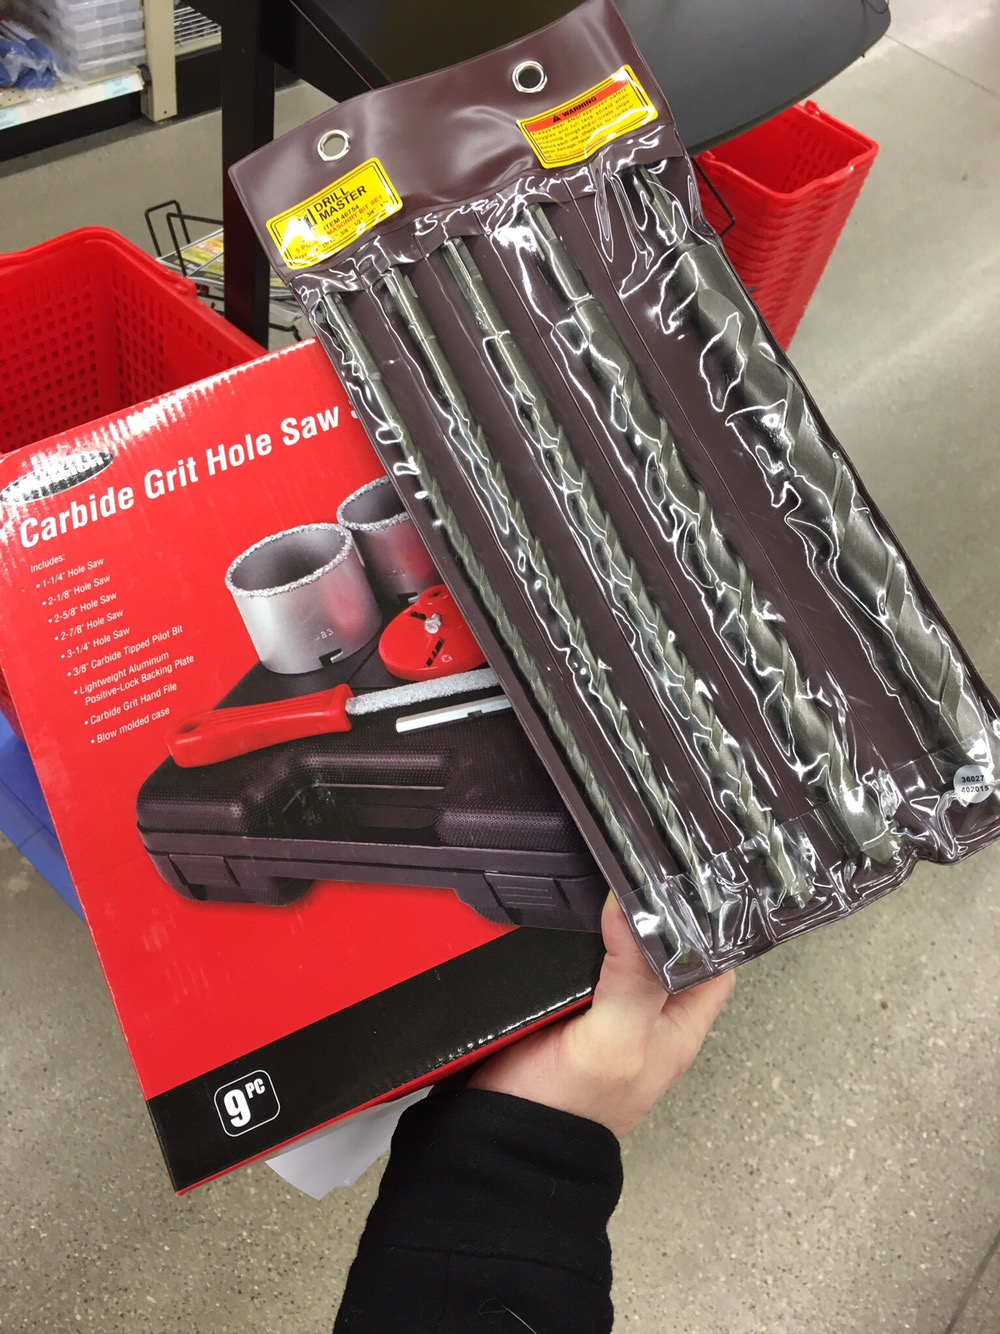
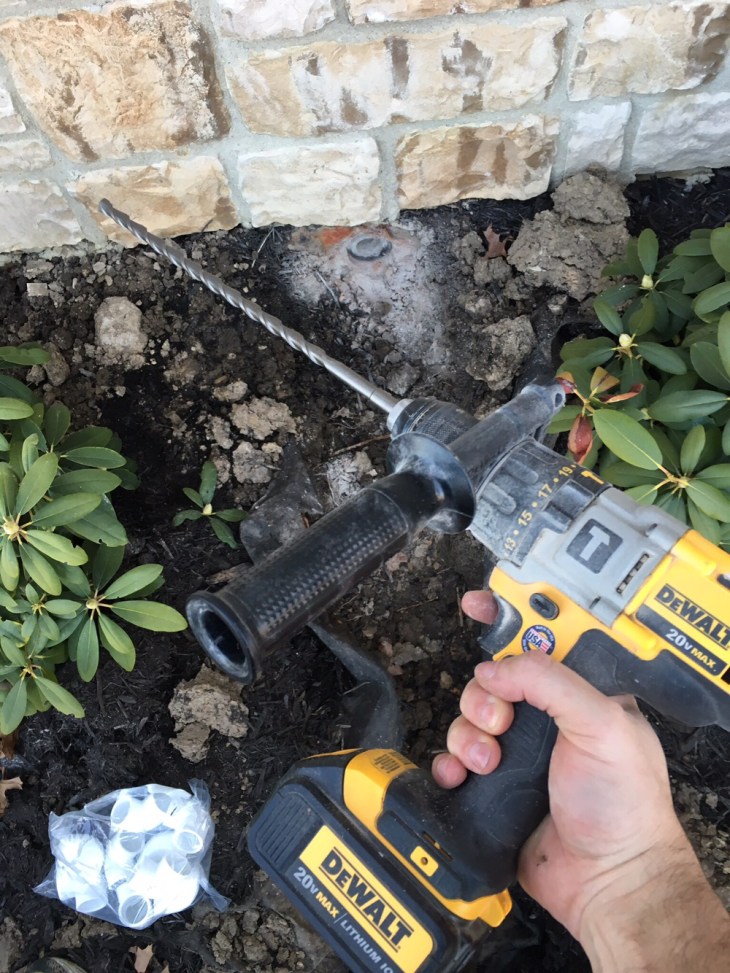
Purchased a hole saw kit for concrete at Harbor Freight, lousy quality but super cheap for this one time situation. You can see in the picture above the guide hole just at ground level (dirt).
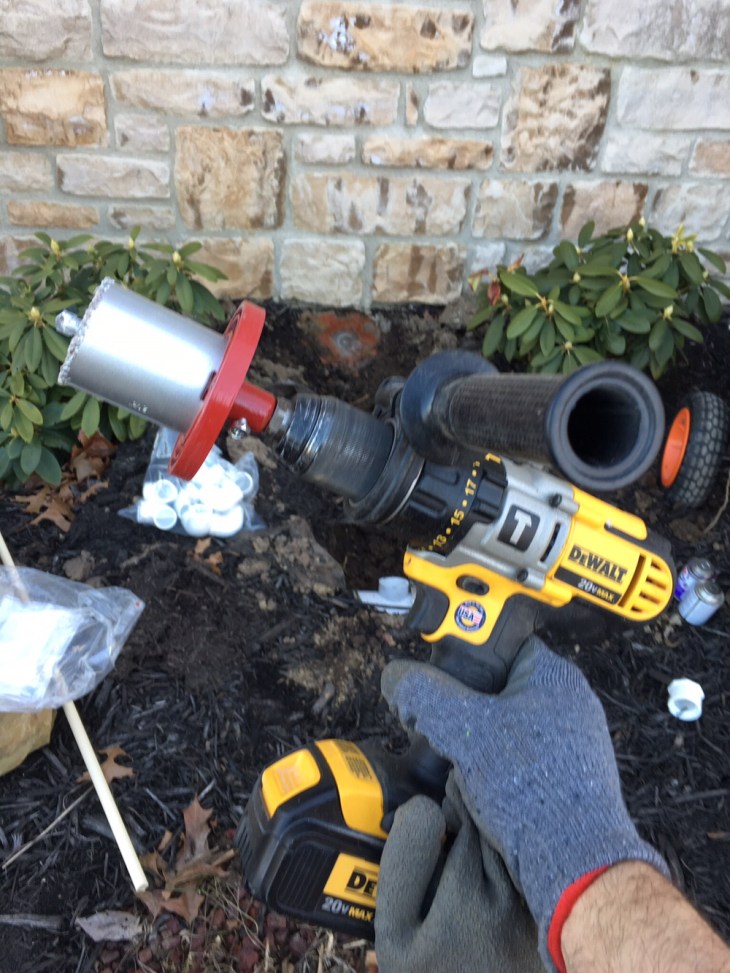
Nice and slow drilling with a higher powered Dewalt drill. Occasionally I had to chisel out a little bit of the concrete. Eventually I hit it from both sides using the guide hole as reference. I also purchased the concrete drill bits 12″ variety pack from Harbor Freight that worked with my drill even tho they were SDS bits.

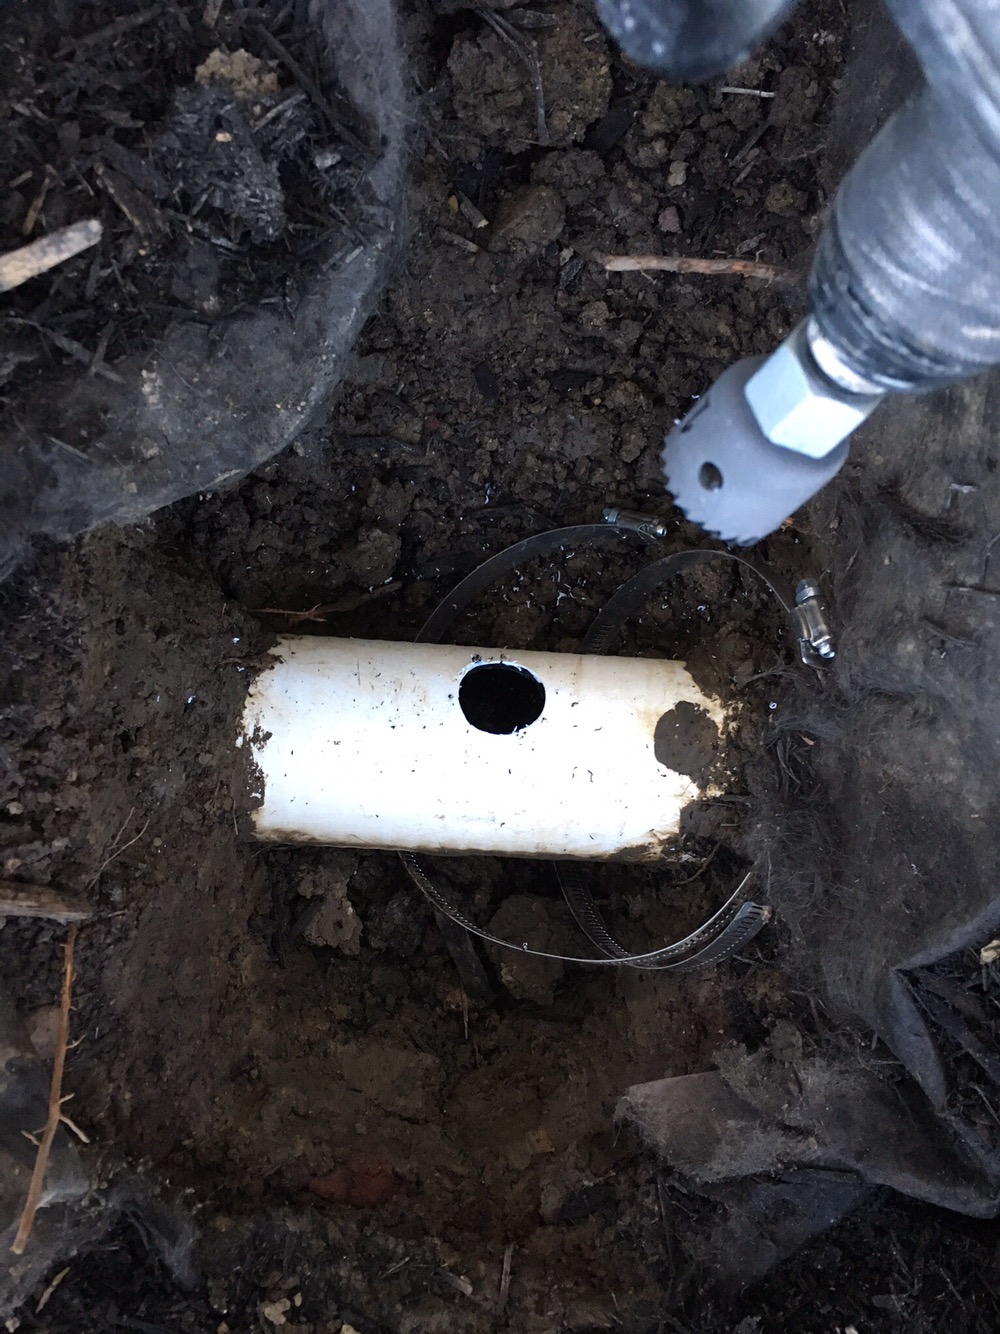
Once the hole was drilled I test fit the PVC pipe to make sure it would reach the existing drain pipe to the street.
This is the existing 4″ drain pipe from my gutters that leads to the street. Used a regular hole saw (wood) for this hole to line up the 1.5″ PVC pipe.
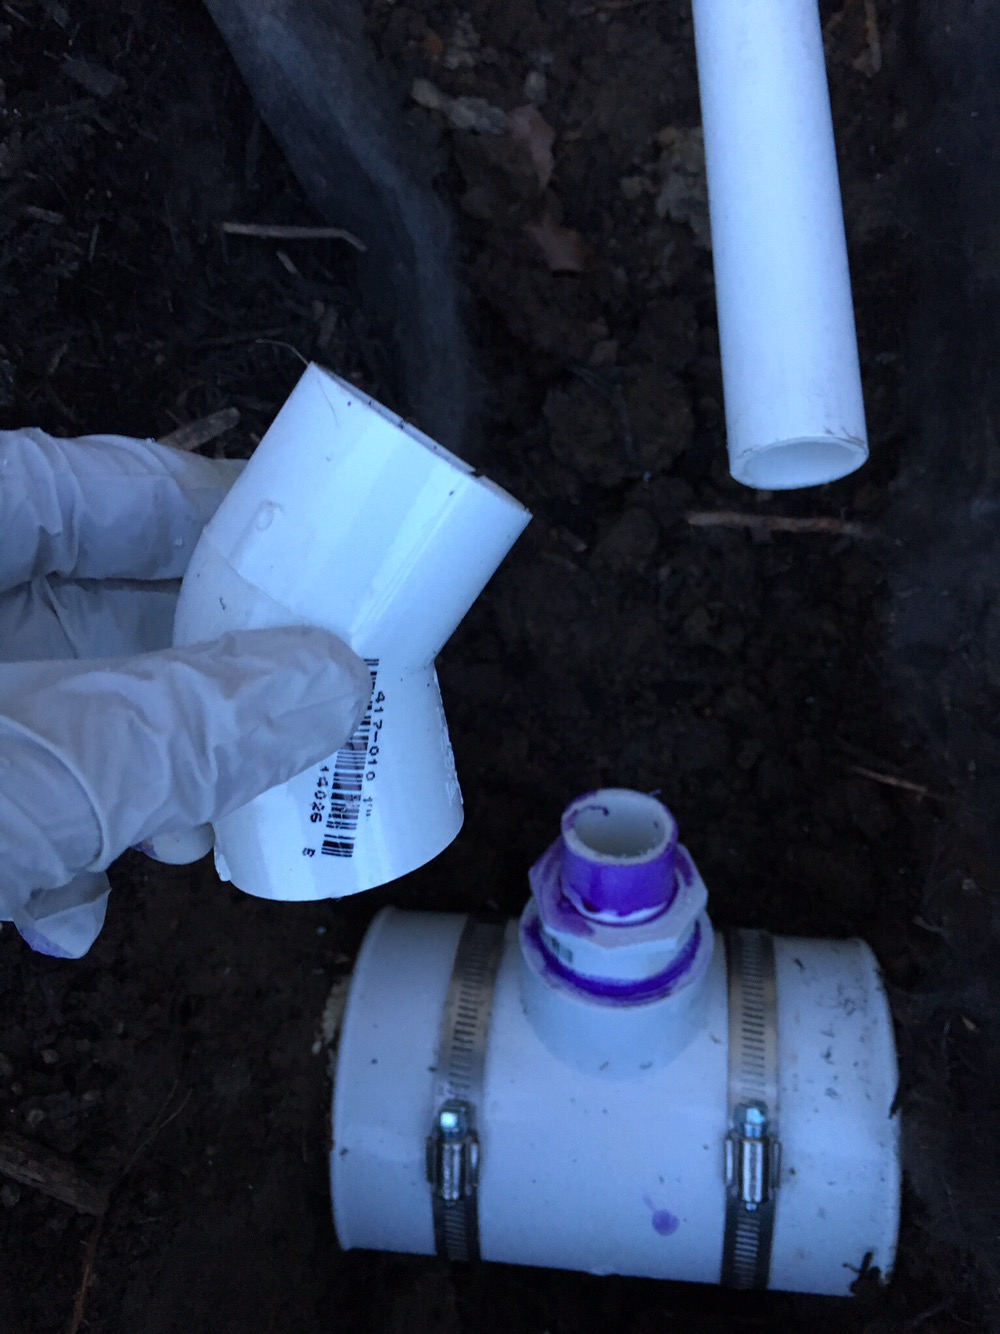
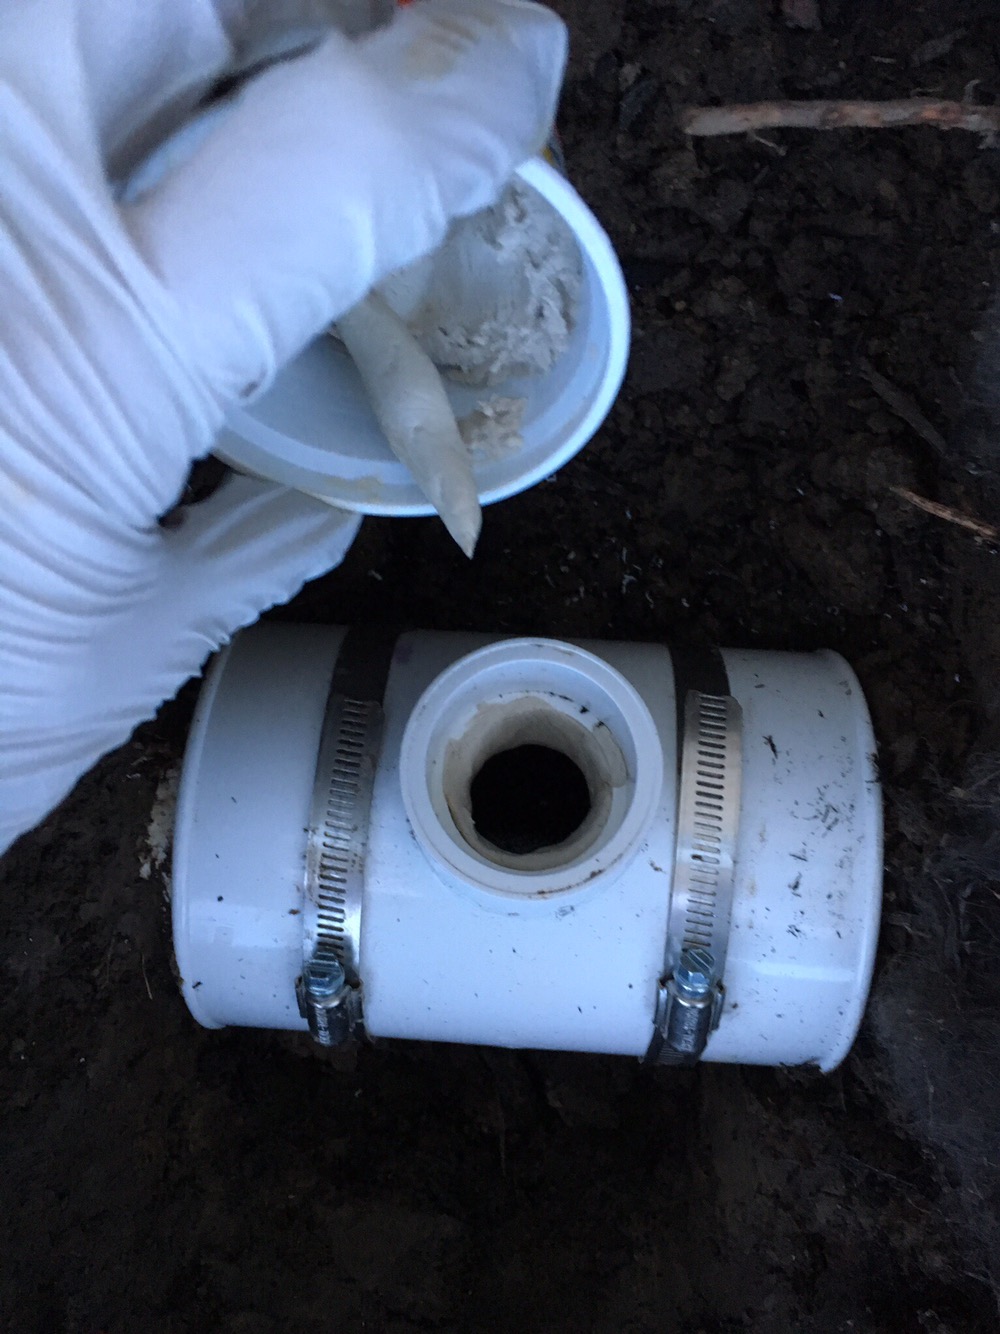
The pictures above show a variety of sleeves/angles/pieces I purchased from Menards to make the fit nice and easy and at an angle so it drains in to the pipe without restrictions.
Above is the final product before I buried it under the dirt. Pretty happy with how it turned out and it didn’t leak a bit! Hopefully no one needs this creative solution but it helps me avoid a flooded basement!
