
The picture above is from one iteration of my ever changing garage layout, and organization. As I continue to add to my collection of tools I now leverage a utility basement room for a wood shop and the garage for storage, lawn care, and automotive. But as I tackle large scale DIY projects I easily consume 2/3 of the garage and it’s rarely this clean!
Below in no particular order are some best practices and successful (or unsuccessful) projects I’ve tackled both at my garage and a rental unit. Hopefully this helps you identify and navigate some things that will make you happy to come home to your garage!
This first entry will focus on methods I took to try and insulate my “contractor” grade garage. Contractor grade means the outside walls (side walls and ceiling) were not insulated as standard with most homes (according to code). In addition my garage door was the cheaper 16 or 18 gauge metal non-insulated variety. Because I work in my garage year round on cars and home projects, the idea of keeping it cool or hot on demand is important. One quick reminder if you’re trying to keep your garage cool, is the cars and engines create a lot of heat. So parking your car in the garage when you get home from work is one of the big culprits.
First Step : Repair and upgrade garage seals.
This consists of bottom, sides, and top. I recommend this to start with because any home after 5 years old likely has issues. All pieces can be purchased cheaply from Menard’s or online. I’ll link to a few examples below.


I had gaps, tears, leaks, you name it across the board. My home was around 9 years old when I purchased it.
- Side Seal – Inspect from the outside, torn at multiple places.
- Bottom Seal – Inspect with garage door open, flapping in the wind.
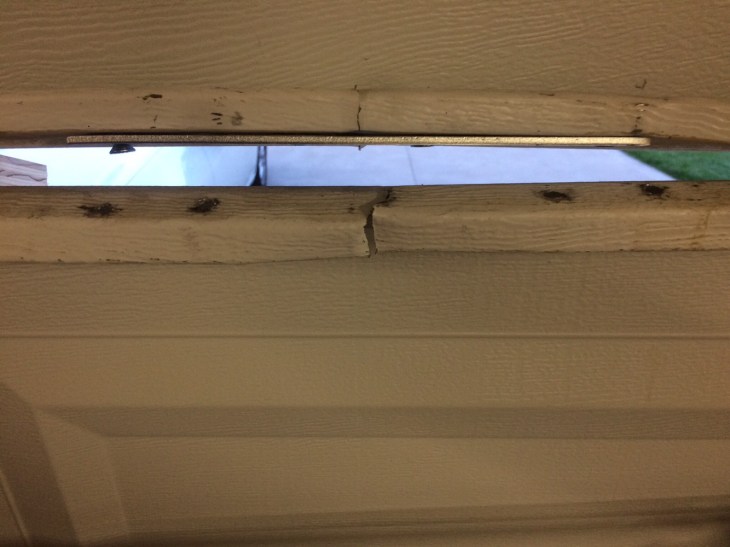
- Top Seal – Inspect from the outside, this was in decent shape, didn’t need to replace. But it actually didn’t seal things very well so I added some additional foam insulation.
- Additional foam if you have gaps between panels that cannot be repaired (due to them bending from stress over years).
- Struts if you have flexing or tearing to the metal panels (if your garage “pops” when it is opening or closing is another sign of flex and weakened panels.). This happens when you have a fast garage door opener. Essentially struts span the length of the garage panel and make it more rigid, so when it is opening the whole panel does not flex inward.
- L Bracket Braces if you have screws that are pulling out. Due to a variety of issues I added these to get a few more years of life with my existing equipment.
- I also replaced my garage door opener, my main model opened and closed too fast which was damaging the garage door. My 3rd car garage (single door) failed completely so I just moved the old unit over to the single car garage and purchased an economical replacement for the 2 door (I picked a quiet model over speed).
Products Quick Reference:
- Green Hinges – I actually spoke with the owner of the company while troubleshooting my install a bit. I found his contact information on the vendor website. One of the panels ended up rubbing the wall due to an additional seal I added. When I removed the seal everything worked fine. An example of over engineering gone wrong! These hinges are spring loaded and much, much stronger than any OEM style hinge. It’s hard to justify the expense unless you intend on heating and cooling your garage and really want to avoid air leaks.
- Threshold Seal : This is good if your garage is on a downward slope, or you have a lot of ice that drips down from your roof and could cause that threshold area to freeze.
- Garage Door Bottom Seal Replacement: You’ll screw the track on the bottom of your garage and then slide this long rubber weather seal. Very easy and effective.
- Side Seal/Top Seal: Depending on the design of your garage you may only be able to use this on the top. My garage used a plastic trim w/ seal attached to it which I picked up at Home Depot for a match so that I only had to replace the damaged sections. (Picture below). It was painted and color matched ready to go. Just be aware there are options that could save you a lot of time.

- I also replaced the wheels, not for insulation but because I thought it might make things a bit quieter. It was a cheap option and honestly you get what you pay for, very little to no improvement across the board. But the product exists and swapping things out is very easy.
Installation & reference pictures to give you some concept on install:


Steps 2: Add insulation to panels. There are a variety of products I reviewed and I picked the rolled insulation with a white back which I could buy kits directly from Menard’s. I found this product to work better then the bubble foil (radiant /reflective barrier), the white rigid foam panels, and unfaced/unbacked products. The kits I purchased also only took around 20-30 minutes to install each (I needed 3 kits) and very user friendly. The white backs gave it fairly clean look. You will need to adjust the spring a little on your garage to accommodate the added mass (most likely). I spent around $175 for all the materials. If you’re not looking to AC/Heat your garage, the second best option is likely the foam panels but make sure you don’t install them flush, there are guides and youtube videos out there. However 90% install them incorrectly. This will save you a lot of money upfront, but ultimately they are less effective. The product you can buy online that is the only one I would recommend is : Owens Corning
Pros:
- R-8 Insulation Level (Heat/Cold)
- Noise reduction (I operate loud saws at all times of the day and night)
- Easy to install
- Easy to clean (never?)


Step 3: Insulate exterior walls
I used big box rolled insulation with a paper brown backing. I used an air compressor stapler to install, another super quick and easy project. I did this in part of my 2 car garage and my 3rd car garage on all exposed framing. I then covered everything in drywall, or wall storage racks (pick your variety, my home came with WallFlow).


I also insulated the areas directly above the garage doors with any extra material I had.
I used a product labeled for external facing walls which has an R-30 value. Big box shops normally have pictures next to the product to show you where it is designed to be installed (interior, exterior, use different R Values, and ceiling or walls use different widths based on framing stud width (24″ vs 16″).

Step 4: Honorable Mention
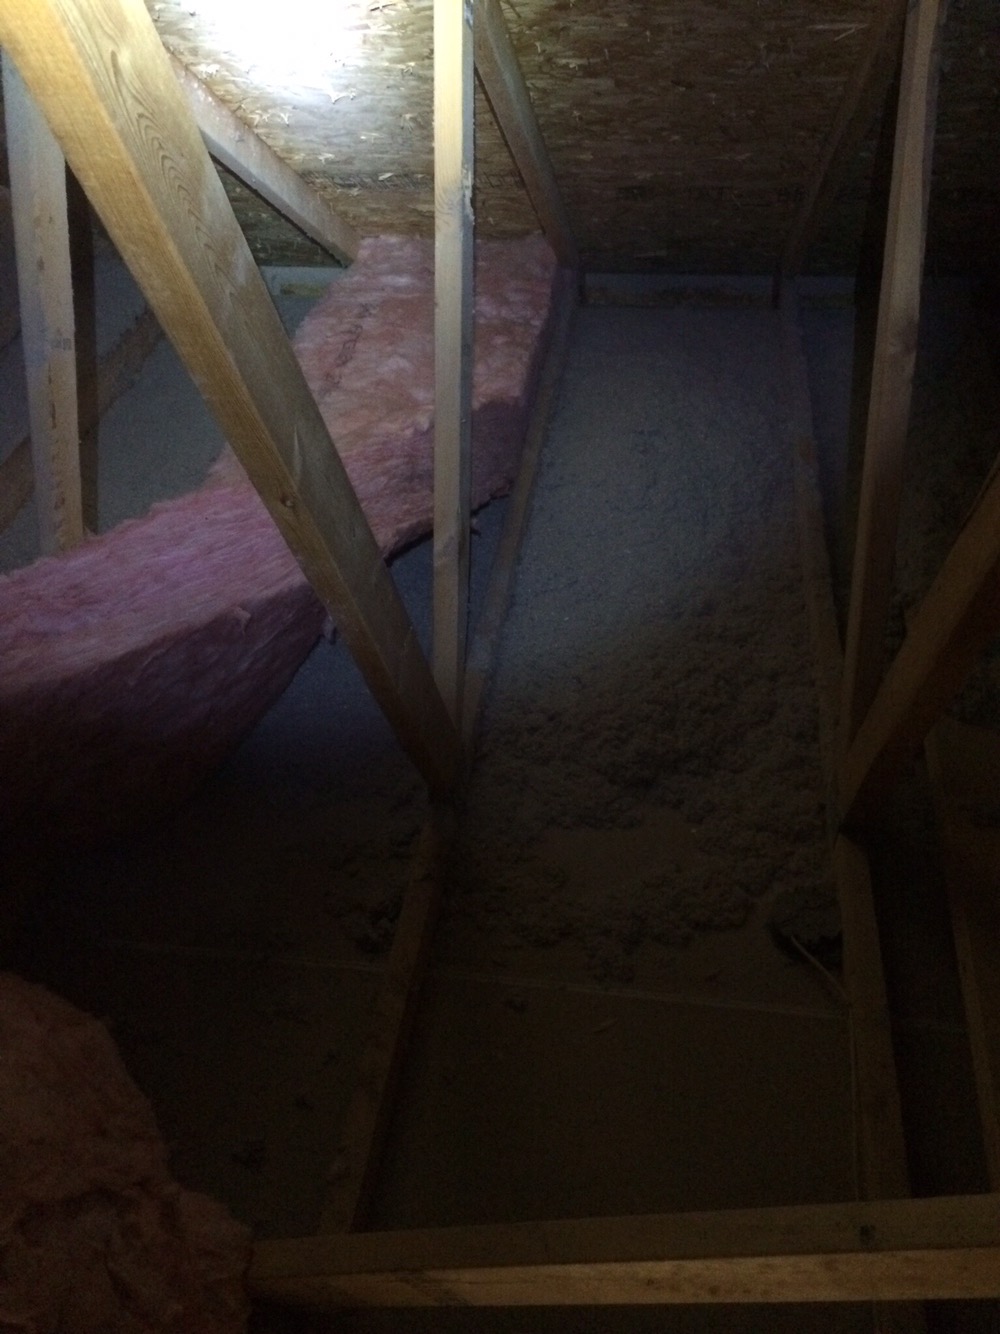
While I was blowing insulation into the attic of my house, I had extra product left over. I chose to blow insulation above the 3rd car garage which had nothing but a sheet of drywall protecting it from the elements. I quickly realized this was a bad idea because of the attic vents. You need to “box” these off so insulation doesn’t obstruct the airflow. Rather then deal with that given the time frame available, I came back at a later time and used the rolled insulation with a 24″ width and it made the application pretty clean and easy. Just watch for the roofing nails above your head!!


DIY for life,
Justin
